Using JuiceFS on ACK in Serverless Container via Fluid
Alibaba Cloud ECI (Elastic Container Instance) is the implementation of Serverless Container on Alibaba Cloud. Similar Kubernetes products based on Serverless Container include AWS Fargate and Azure AKS ACI. Fluid is an open source Kubernetes-native Distributed Dataset Orchestrator and Accelerator for data-intensive applications, such as big data and AI. Fluid has been included as ACK-AI suit in ACK, users can directly install and use JuiceFSRuntime.
Architecture
Fluid injects FUSE client (different runtime are supported, including JuiceFS) as a sidecar container into serverless pod, by detecting Fluid PVC (PersistentVolumeClaim) used in the application pod. JuiceFS Client runs independently inside the sidecar container, sharing lifecycle with the application pod.
In order to improve data accelerate capabilities, a dedicated cache cluster is recommended, use ECS nodes to run worker pods and provide distributed cache for application pods. The cache cluster runs on ECS nodes as a StatefulSet, while the JuiceFS clients used by application pods runs as sidecar containers on ECI nodes.
Prepare environment
- Fluid is available on ACK Pro clusters (Kubernetes >= 1.18). Before you begin, you should first create a cluster.
- Set the privileged security context for ACS Pods. (Deprecated)
Install Fluid
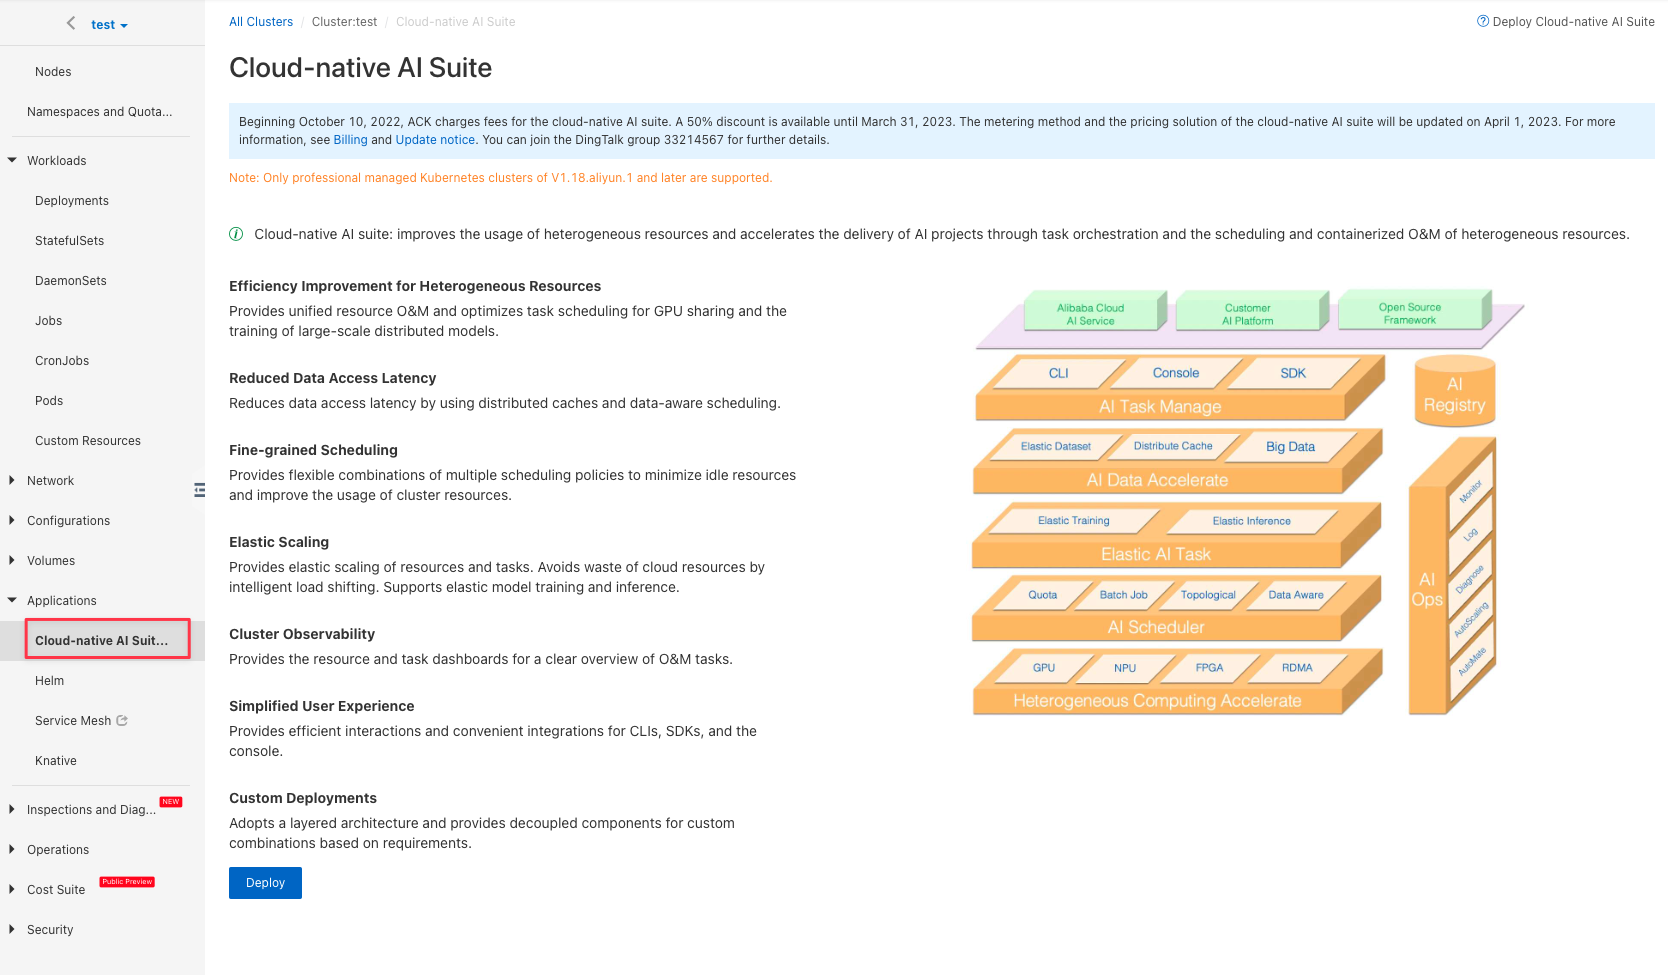
From the ACK console, select "Applications → Cloud-native AI Suite", and click "Deploy" to install the Cloud-native AI Suite.
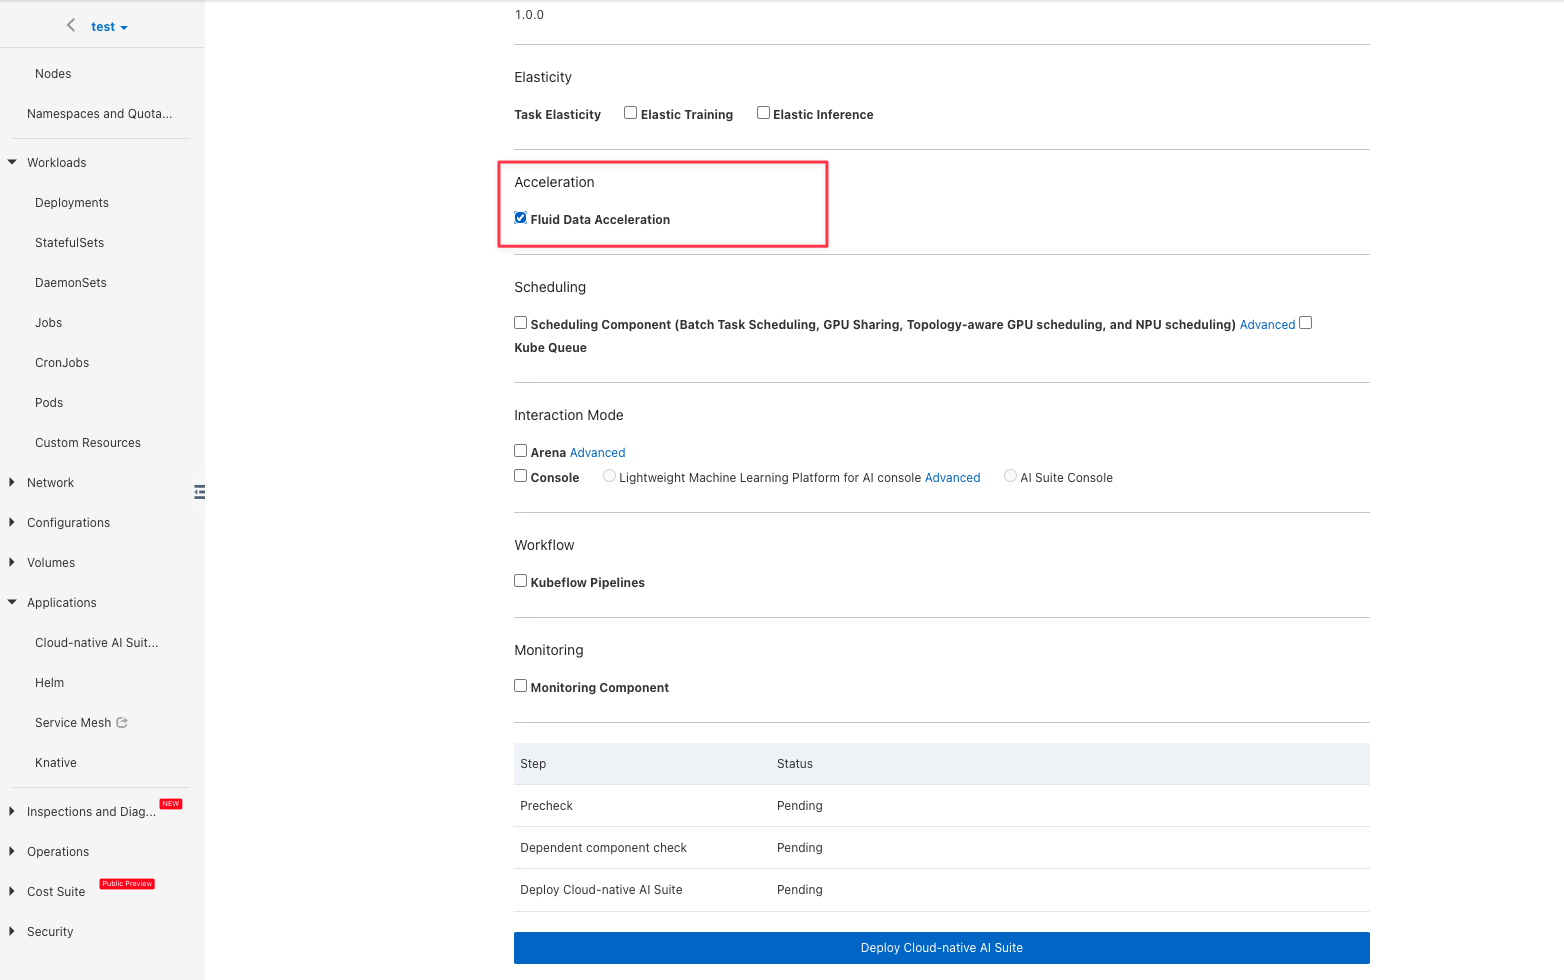
Select "Fluid Data Acceleration":
Install virtual node
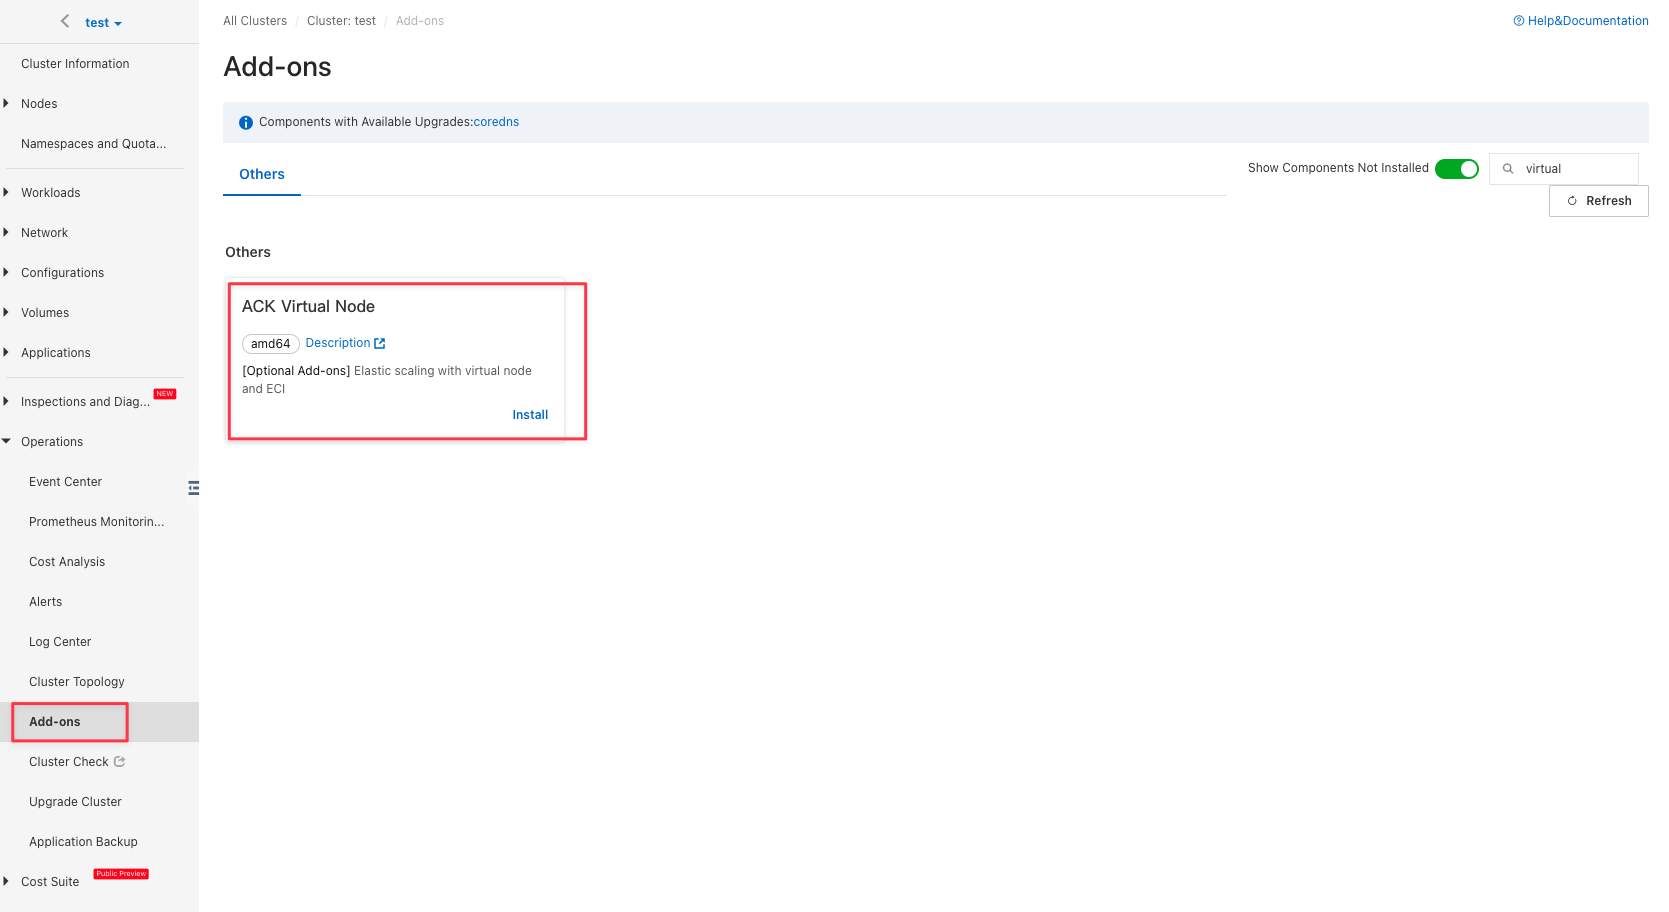
In Kubernetes cluster, ECI applications are scheduled to a virtual node and actually run on a temporary ECS node. In the "Add-ons" of "Operations", install "ACK Virtual Node":
Use JuiceFS
JuiceFS is an architecture that separates metadata and actual file data. Metadata will be stored in the Metadata Service, and data will be uploaded to an object storage service of your choice. Since distributed cache is a Cloud Service exclusive feature, we'll use JuiceFS Cloud Service to demonstrate.
Before starting, make sure you have created a JuiceFS file system, and have successfully mounted and verified to be able to read and write normally.
Create Secret
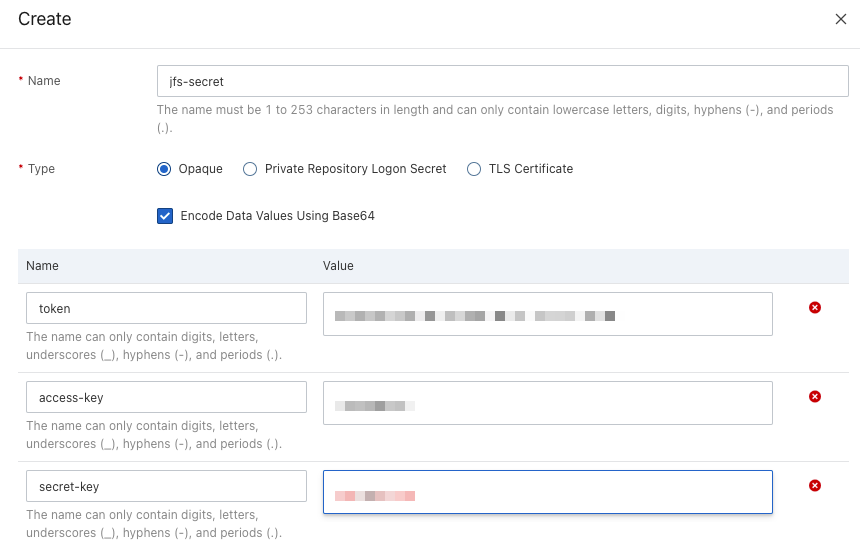
Create a secret in the ACK cluster, and provide the JuiceFS Volume Token and object storage credentials.
Create JuiceFSRuntime
In "Custom Resources", click "Create from YAML" button to create JuiceFSRuntime, and specify information such as replicas and cache directories.
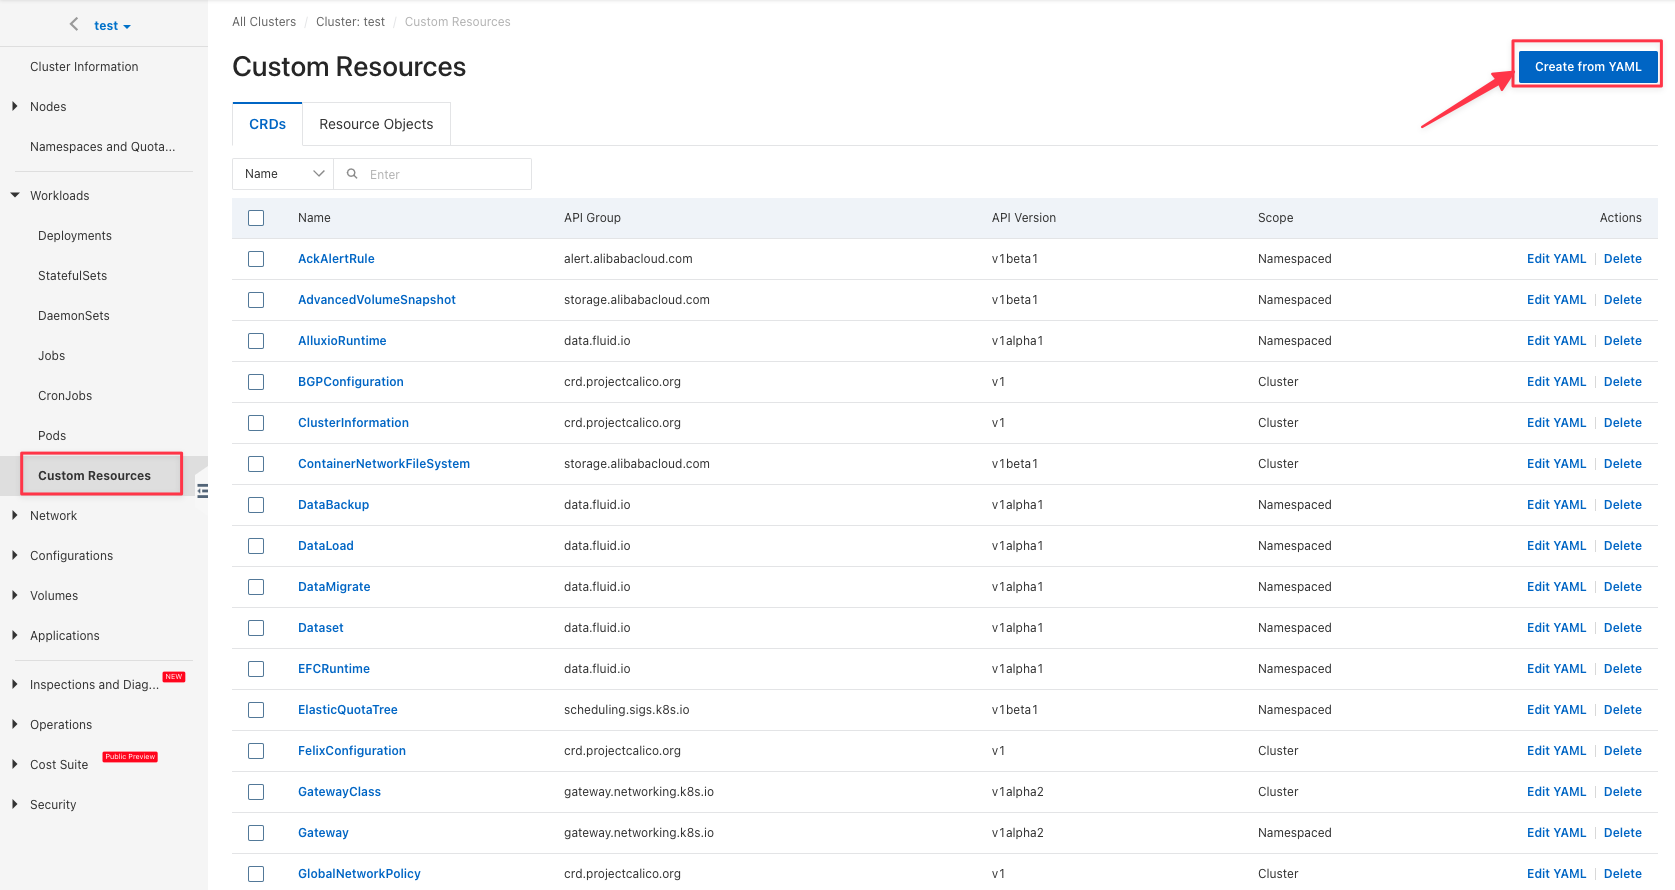
The JuiceFSRuntime example is as follows:
apiVersion: data.fluid.io/v1alpha1
kind: JuiceFSRuntime
metadata:
  name: jfsdemo
spec:
  # The number of nodes in the cache cluster
  replicas: 5
  podMetadata:
    labels:
      # Use this label to run cache cluster within ECI
      # alibabacloud.com/eci: "true"
  tieredstore:
    levels:
      - mediumtype: MEM
        path: /dev/shm
        quota: 40Gi
        low: "0.1"
        volumeType: emptyDir
Use temporary storage space as cache disk for Worker Pod
By default, the Worker Pod uses the path defined in tieredstore as the cache directory (that is, the cache-dir option). For example, in the above example, the cache-dir of the Worker Pod is /dev/shm. In order to allow the Worker Pod to have a larger cache storage, you can use ECI temporary storage space as the Worker Pod's cache disk.
The ECI provides 30GiB of temporary storage space by default. In order to expand the capacity of the temporary storage space, it can be achieved by adding annotations to the Worker Pod:
apiVersion: data.fluid.io/v1alpha1
kind: JuiceFSRuntime
metadata:
  name: jfsdemo
spec:
  # The number of nodes in the cache cluster
  replicas: 5
  podMetadata:
    labels:
      # Run cache cluster within ECI
      alibabacloud.com/eci: "true"
  # Worker Pod config
  worker:
    podMetadata:
      annotations:
        # Set the capacity of ECI temporary storage space
        k8s.aliyun.com/eci-extra-ephemeral-storage: "200Gi"
  tieredstore:
    levels:
      - mediumtype: SSD
        path: /var/jfsCache
        quota: 200Gi
        low: "0.1"
        volumeType: emptyDir
Create Dataset
In "Custom Resources", create a Dataset using raw YAML. Fill in the object storage bucket in the options, and reference previously created Secret in encryptOptions:
The Dataset example is as follows:
apiVersion: data.fluid.io/v1alpha1
kind: Dataset
metadata:
  name: jfsdemo
spec:
  mounts:
    - name: <vol-name> # Get volume name in JuiceFS console
      mountPoint: "juicefs:///"
      options:
        bucket: <bucket>
      encryptOptions:
        - name: token
          valueFrom:
            secretKeyRef:
              name: jfs-secret
              key: token
        - name: access-key
          valueFrom:
            secretKeyRef:
              name: jfs-secret
              key: access-key
        - name: secret-key
          valueFrom:
            secretKeyRef:
              name: jfs-secret
              key: secret-key
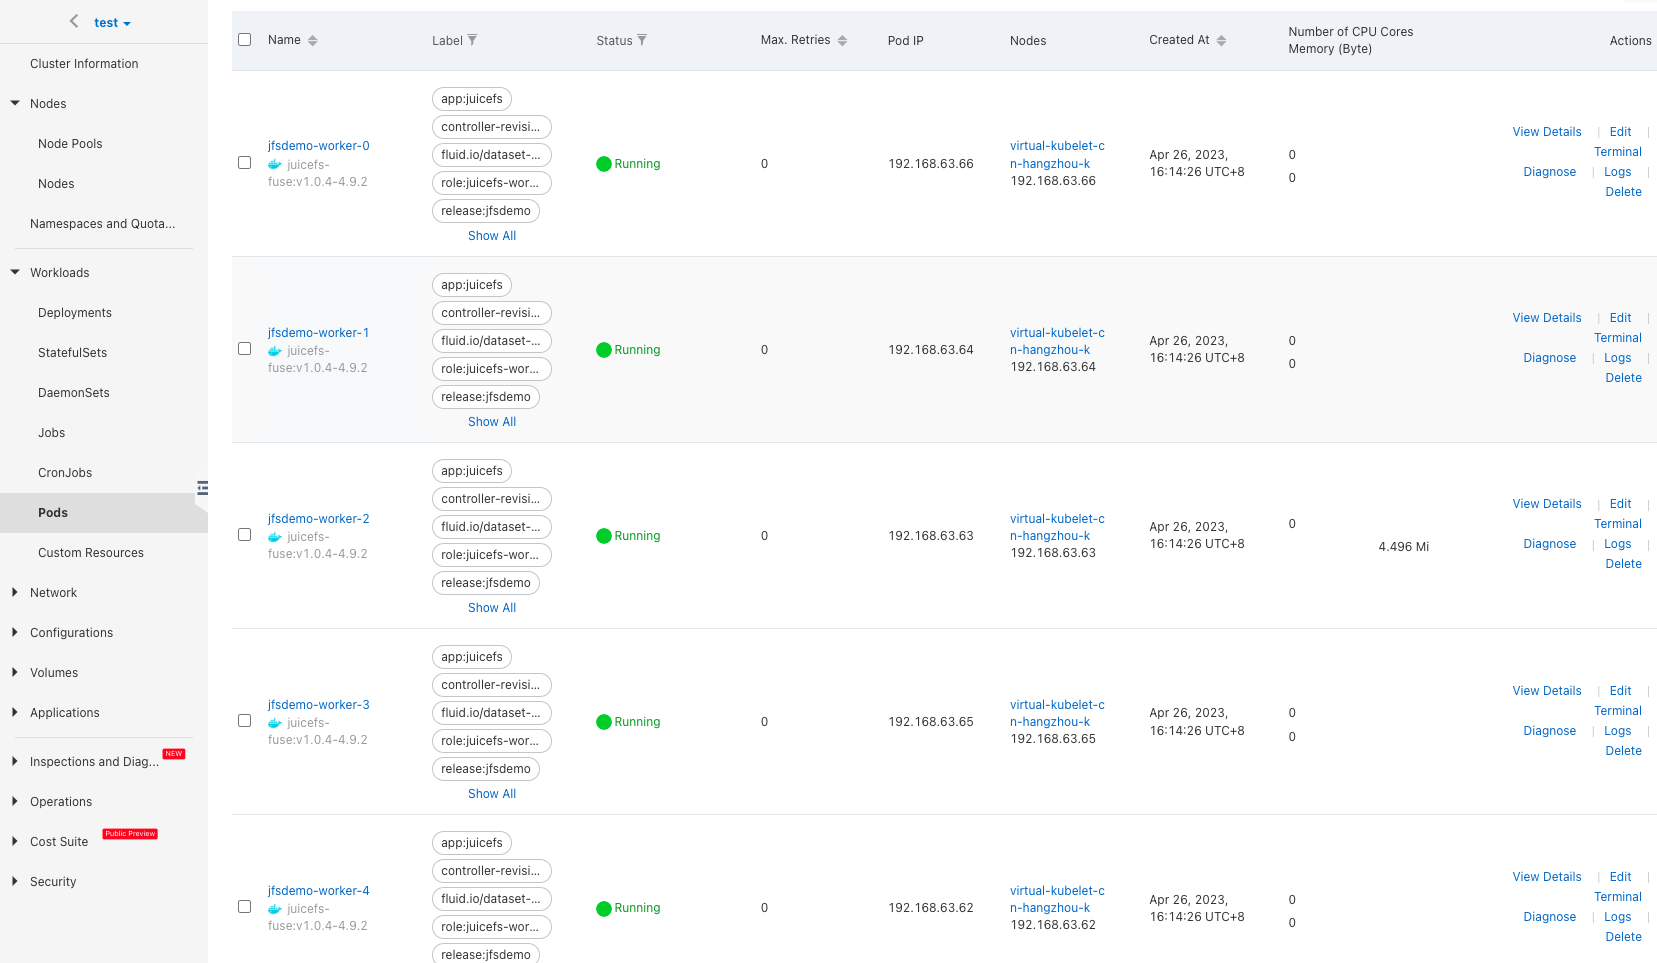
Navigate to the "Pods" page, verify that the worker pods have been created, these five worker pods form a dedicated cache cluster, providing distributed cache for JuiceFS clients:
Cache acceleration
11G of test data (110k files of 1Mi size) have been prepared in the JuiceFS Volume in advance. After the cache cluster is created, warm up the cache by creating a DataLoad, referencing the Dataset created previously:
apiVersion: data.fluid.io/v1alpha1
kind: DataLoad
metadata:
  name: jfs-load
spec:
  dataset:
    name: jfsdemo
    namespace: default
Head to the "Task" page, verify that the jfs-load-loader-job has completed, which means data has been warmed up.
Create application
Create application pod and use the PVC with the same name as the above Dataset. We'll create a job to run a simple file copy test:
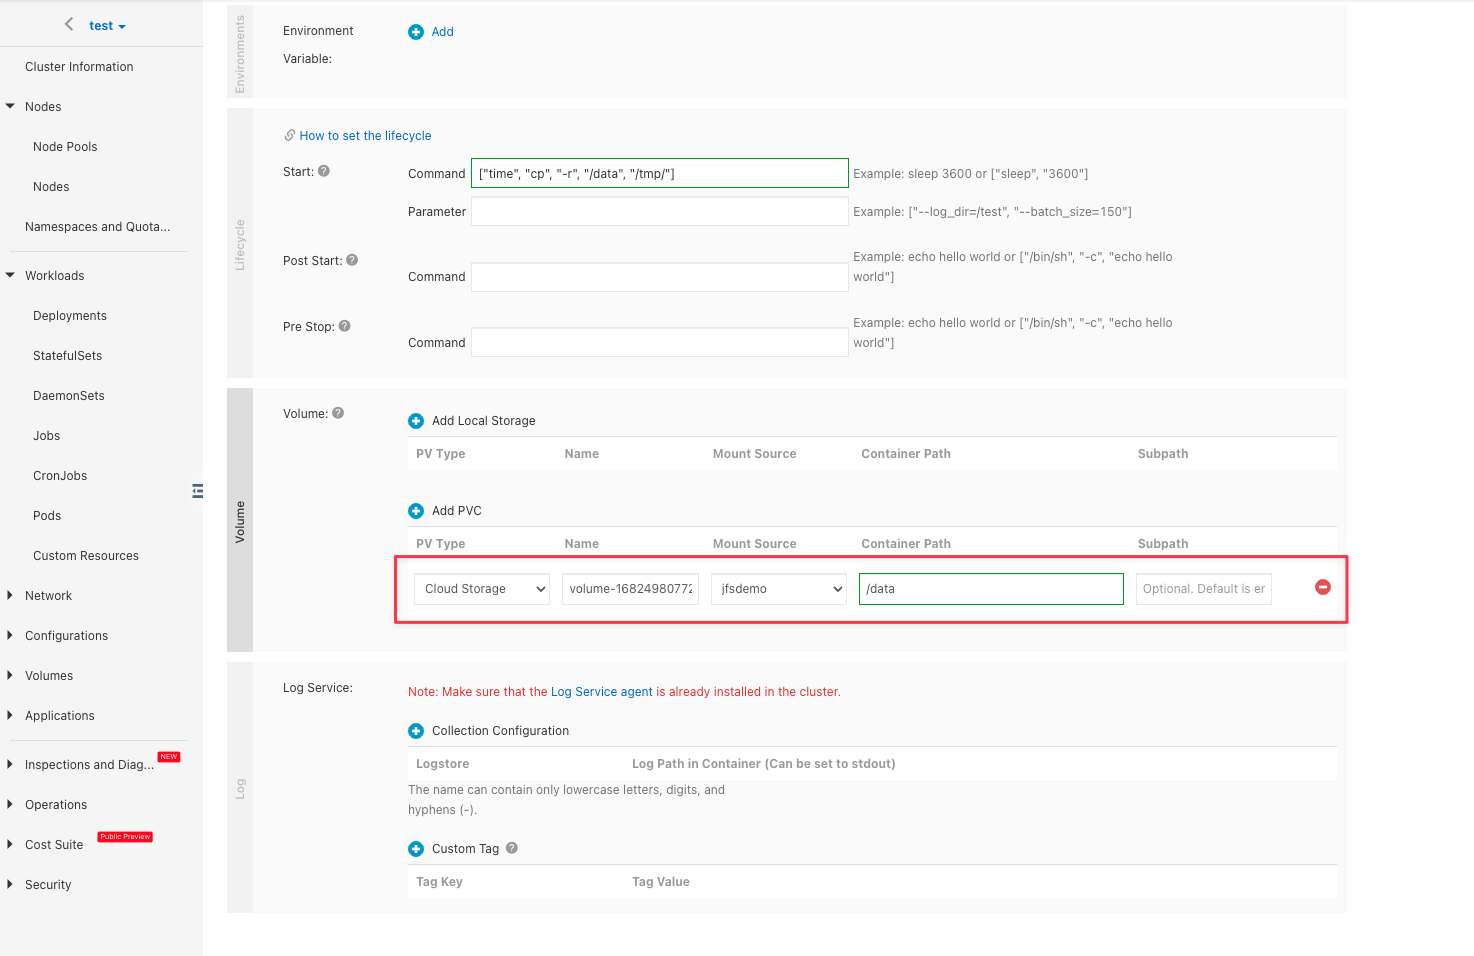
Set the following two labels for the pod:
- Labels for ACS Pod
- Labels for ECI Pod
    alibabacloud.com/fluid-sidecar-target: acs
    alibabacloud.com/acs: "true"
    alibabacloud.com/fluid-sidecar-target: eci
    alibabacloud.com/eci: "true"
Verify that there is a fluid-fuse container injected into the pod, and it runs on the virtual node:
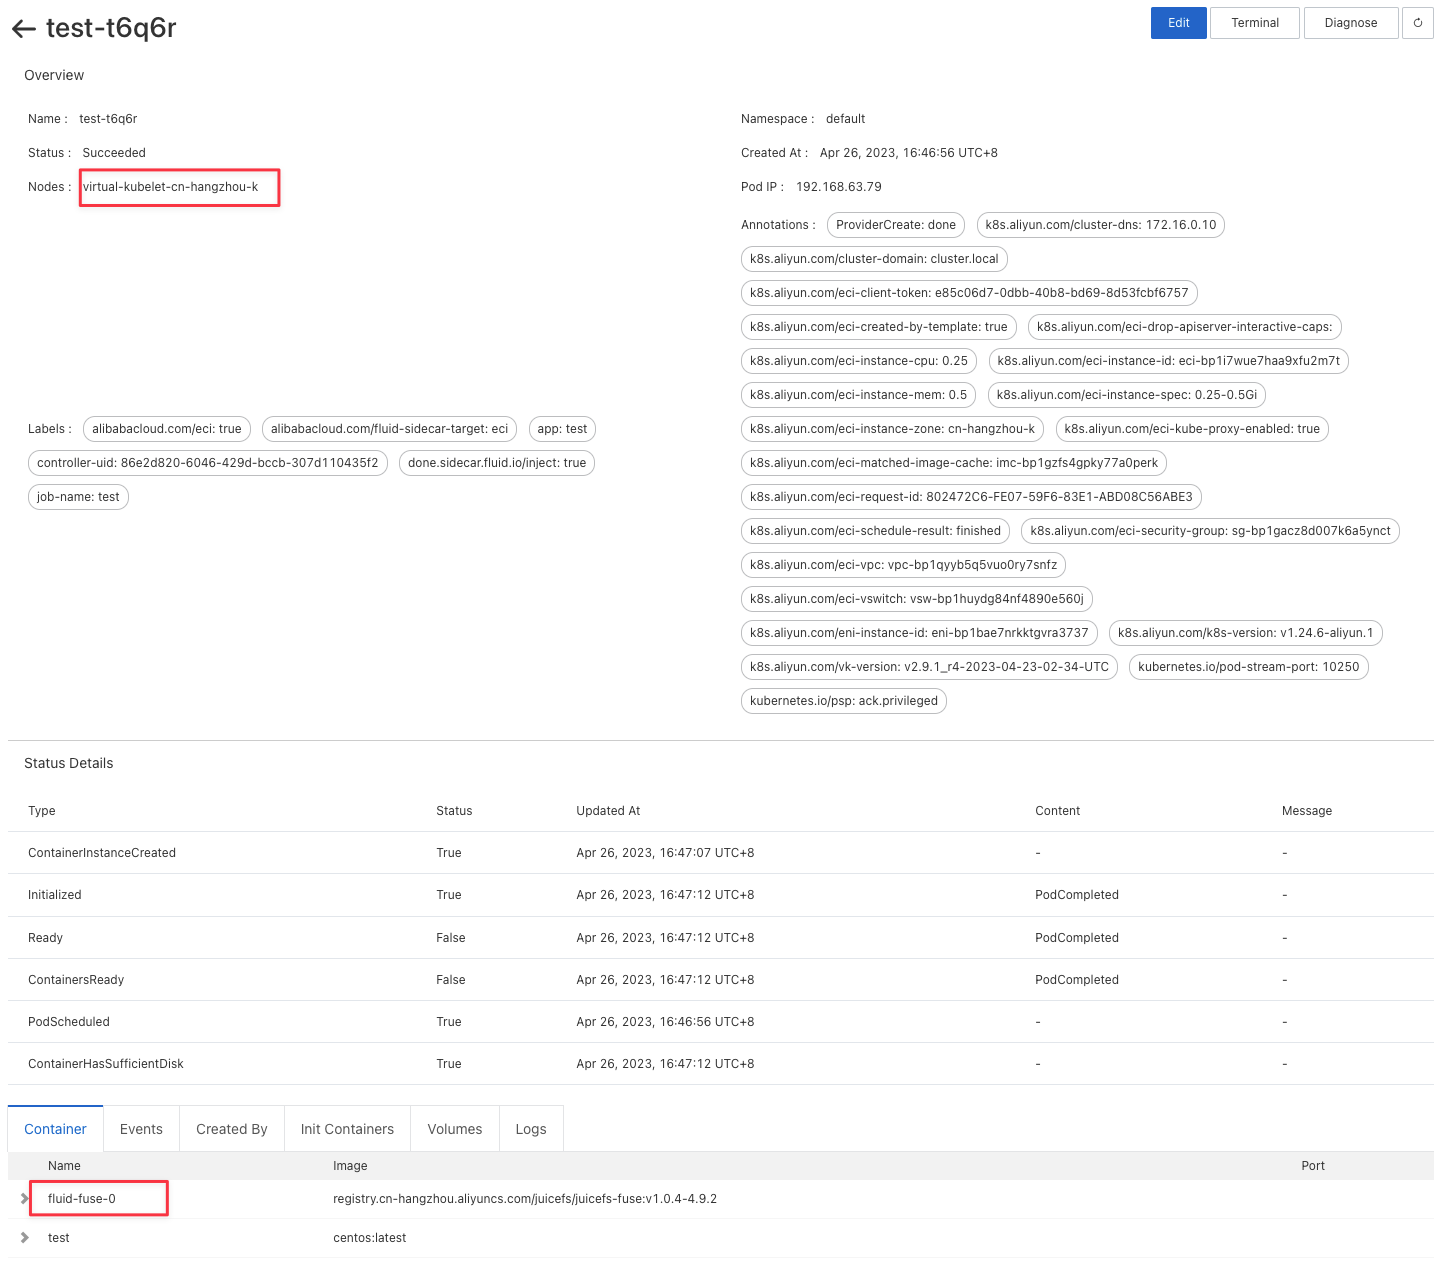
Now, the pod is running on the ECI node. Pod log will show the data copy result:
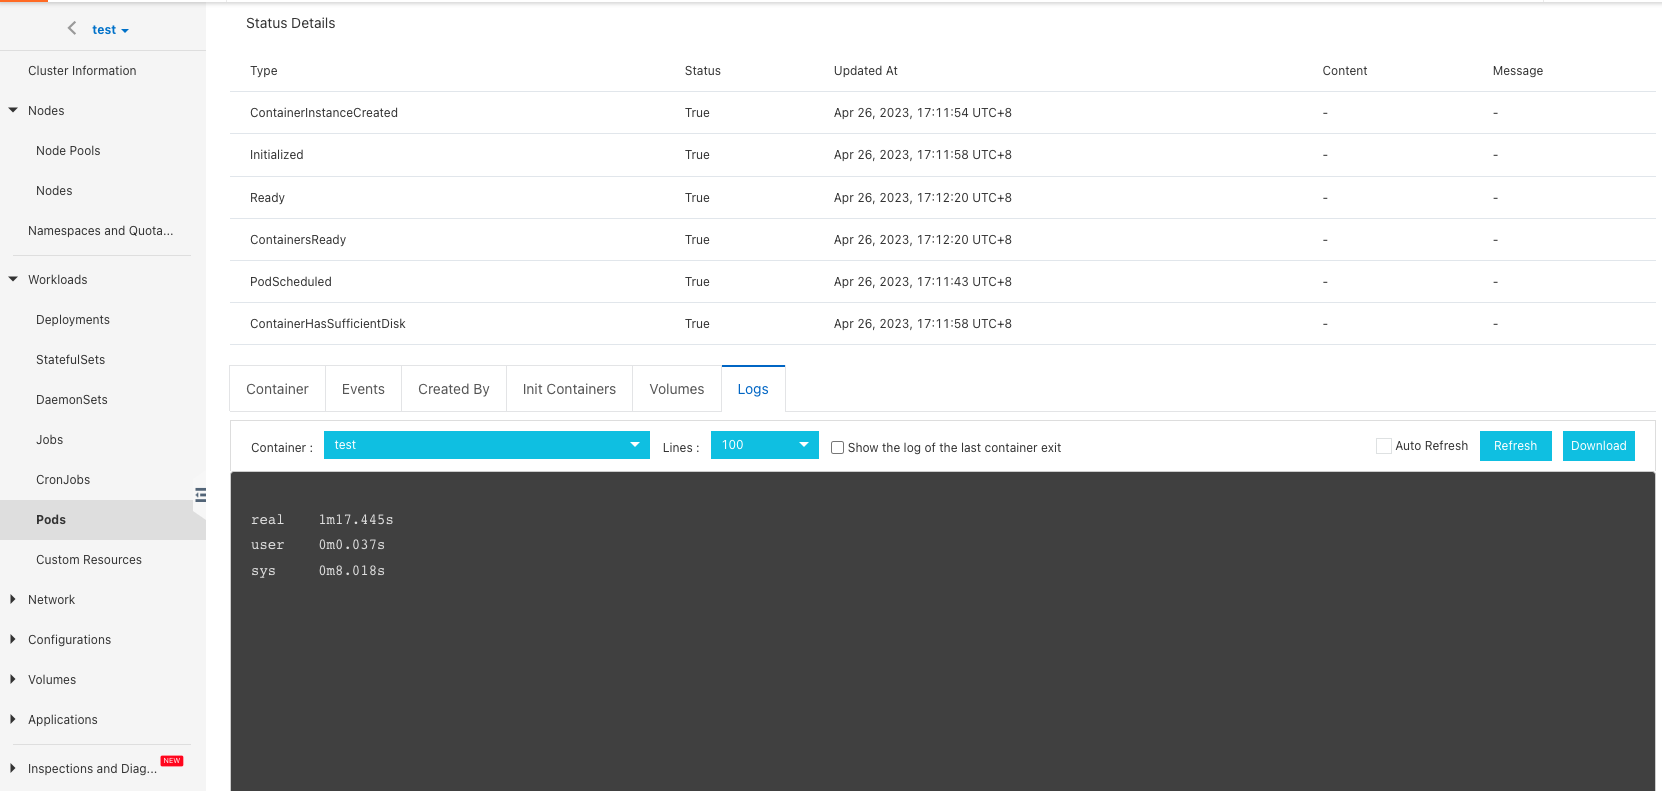
Cache acceleration benefits
Running the same job, this time without cache acceleration:
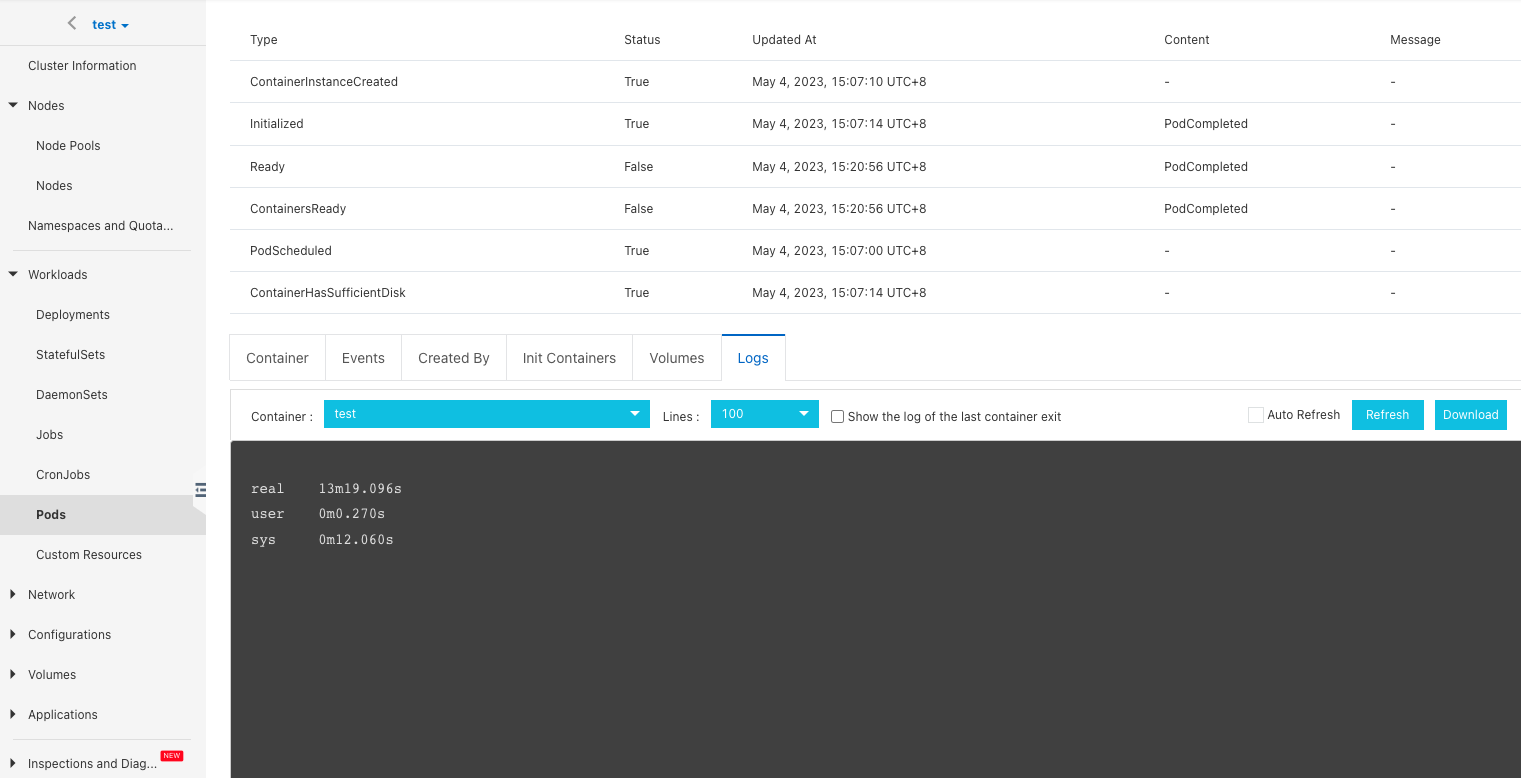
It can be seen that without distributed cache, the time to copy the same data is 13m19.096s. Compared with the distributed cache acceleration above, the copy time is shortened to 1m17.445s, and the speed is increased by 13 times.


