Using JuiceFS on Windows
Quick Start Video
Install JuiceFS Client
On Windows, JuiceFS relies on WinFsp to mount the file system. You can download the latest version from the WinFsp Repository. After installation, it is recommended to restart your computer to ensure all components are loaded properly.
The installation guide introduces various ways to install JuiceFS on Windows. Here, we detail the manual installation process.
Step 1: Download JuiceFS Client
Go to the project's Release page and download the latest JuiceFS client, for example, juicefs-1.3.0-windows-amd64.tar.gz.
Step 2: Create Program Directory
For better management, it is recommended to create a dedicated directory for the JuiceFS client. For example, create a folder named juicefs under C:\, and place the extracted juicefs.exe inside.
Step 3: Configure Environment Variables
To conveniently use the juicefs command in the command line, add the JuiceFS client directory to your system's environment variables:
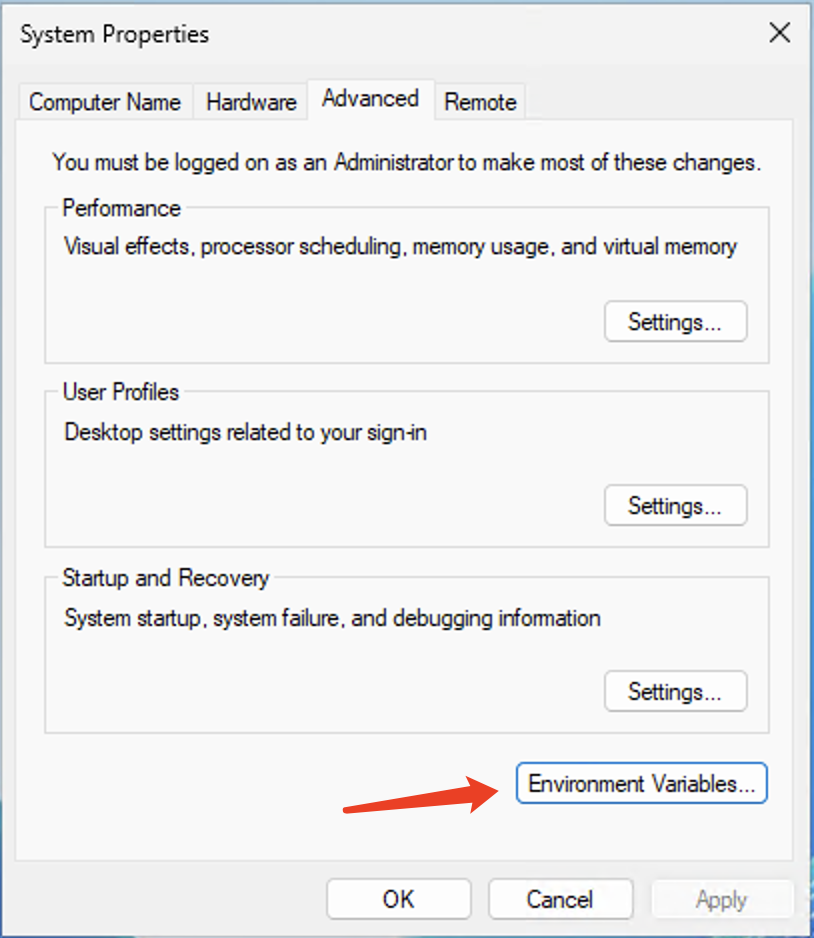
- Right-click "This PC" or "Computer" and select "Properties";
- Click "Advanced system settings";
- In the "System Properties" window, click the "Environment Variables" button;
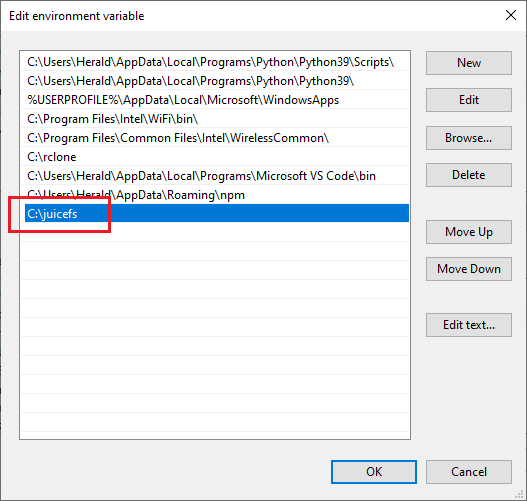
- In the "System variables" section, find the variable named
Path, select it and click "Edit"; - In the edit window, click "New" and enter the JuiceFS client directory path, e.g.,
C:\juicefs; - Click "OK" to save changes.
Step 4: Verify Installation
After installation, verify the JuiceFS client via the command line. Open Command Prompt (CMD) or PowerShell and enter:
juicefs version
If installed successfully, you should see output similar to:
juicefs version 1.3.0+2025-07-03.30190ca1094d2
Create and Mount File System
The steps to create and mount a JuiceFS file system are similar to other operating systems, but pay attention to Windows command line syntax and path formats.
Create File System
juicefs format --storage oss `
        --bucket https://your-bucket.oss-cn-region.aliyuncs.com `
        --access-key your-access-key `
        --secret-key your-secret-key `
        redis://your-redis-host:6379/0 `
        mywinfs
Unlike Linux, Windows command lines use backticks (`) for line continuation.
Mount File System
On Windows, the mount point must be an unused drive letter (such as X, Y, Z, etc.). This differs from Linux and macOS, which mount file systems to directories.
juicefs mount -d redis://your-redis-host:6379/0 X:
Environment Variable Configuration
For security, to avoid entering passwords in plain text, you can store sensitive information in environment variables. When mounting the file system or enabling S3 Gateway, the client will automatically read from these variables.
Common environment variables for JuiceFS on Windows:
| Variable Name | Description |
|---|---|
META_PASSWORD | Metadata engine password |
MINIO_ROOT_USER | S3 Gateway Access Key |
MINIO_ROOT_PASSWORD | S3 Gateway Secret Key |
Set these variables directly in the command line:
set META_PASSWORD=your_password
set MINIO_ROOT_USER=your_access_key
set MINIO_ROOT_PASSWORD=your_secret_key
Note: This method only works for the current session. Once the window is closed, the variables are lost and need to be reset.
Persist Environment Variables
To automatically load these variables every time Windows starts, set them as system environment variables:
-
Open System Environment Variable Settings
- Press
Win + S, search for and open "Edit the system environment variables". - Click the "Environment Variables" button.
- Press
-
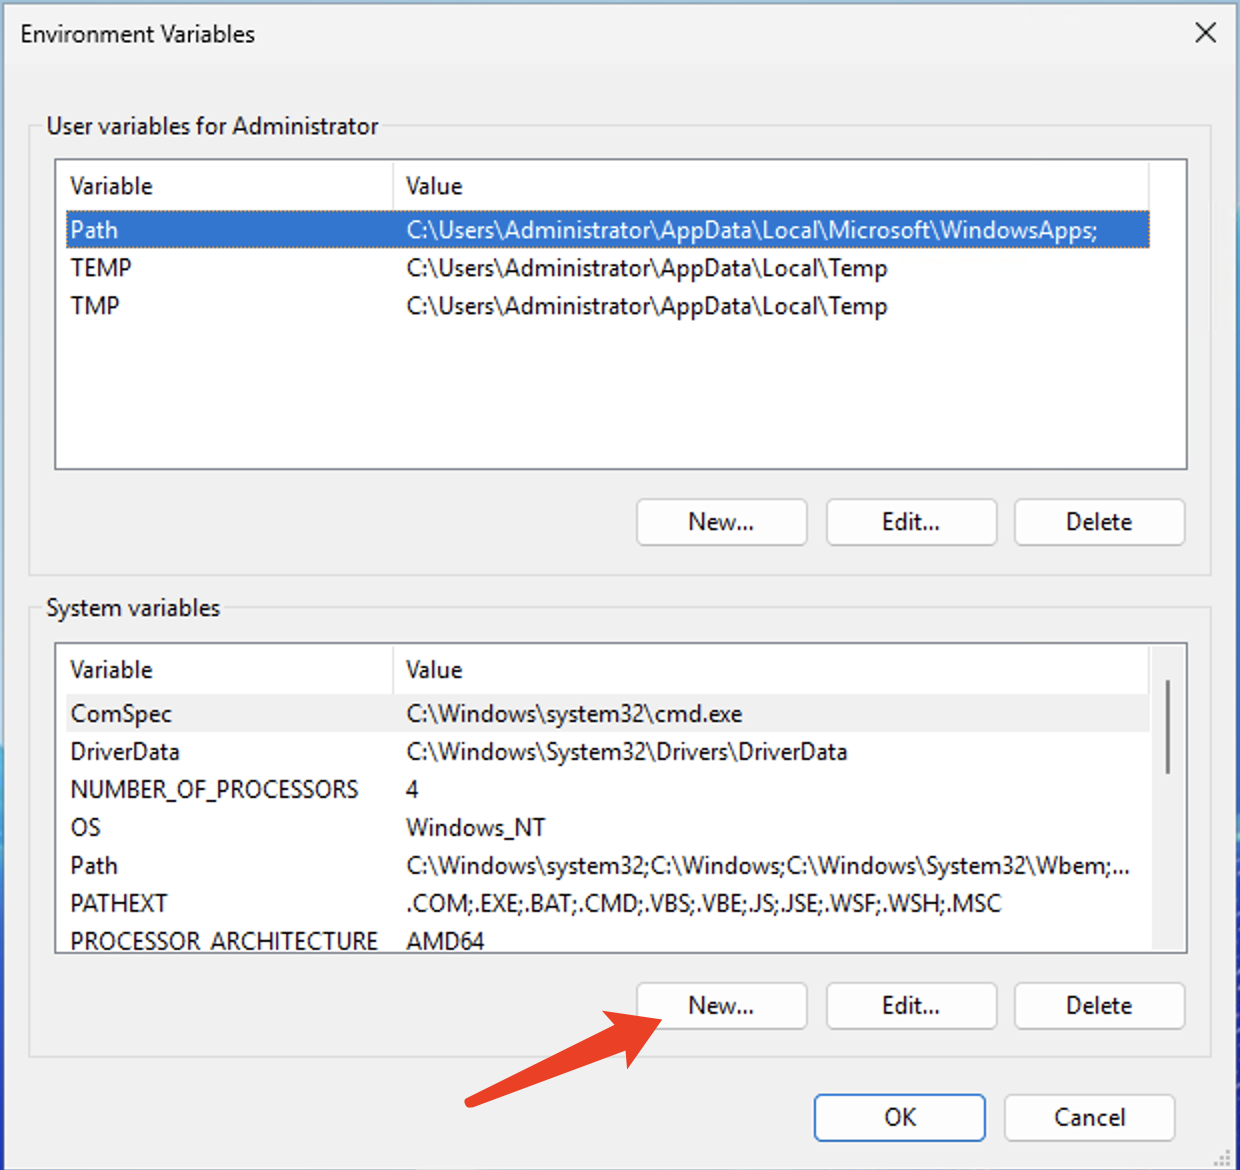
Create System-Level Environment Variable
- In the "System variables" area, click "New".
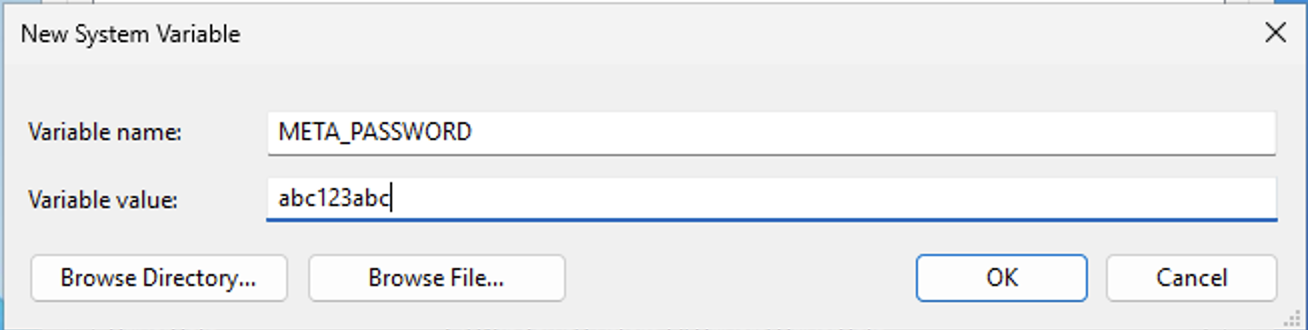
- Variable name: e.g.,
META_PASSWORD - Variable value: Enter the password or key
- Click "OK" to save.
-
Verify Environment Variable
Reopen the terminal and try mounting the file system without specifying the password. If successful, the environment variable is effective.
Auto-Mount on Startup
There are several ways to enable auto-mount on startup in Windows. This section introduces the method using "Task Scheduler".
-
Open "Task Scheduler" and click "Create Task".
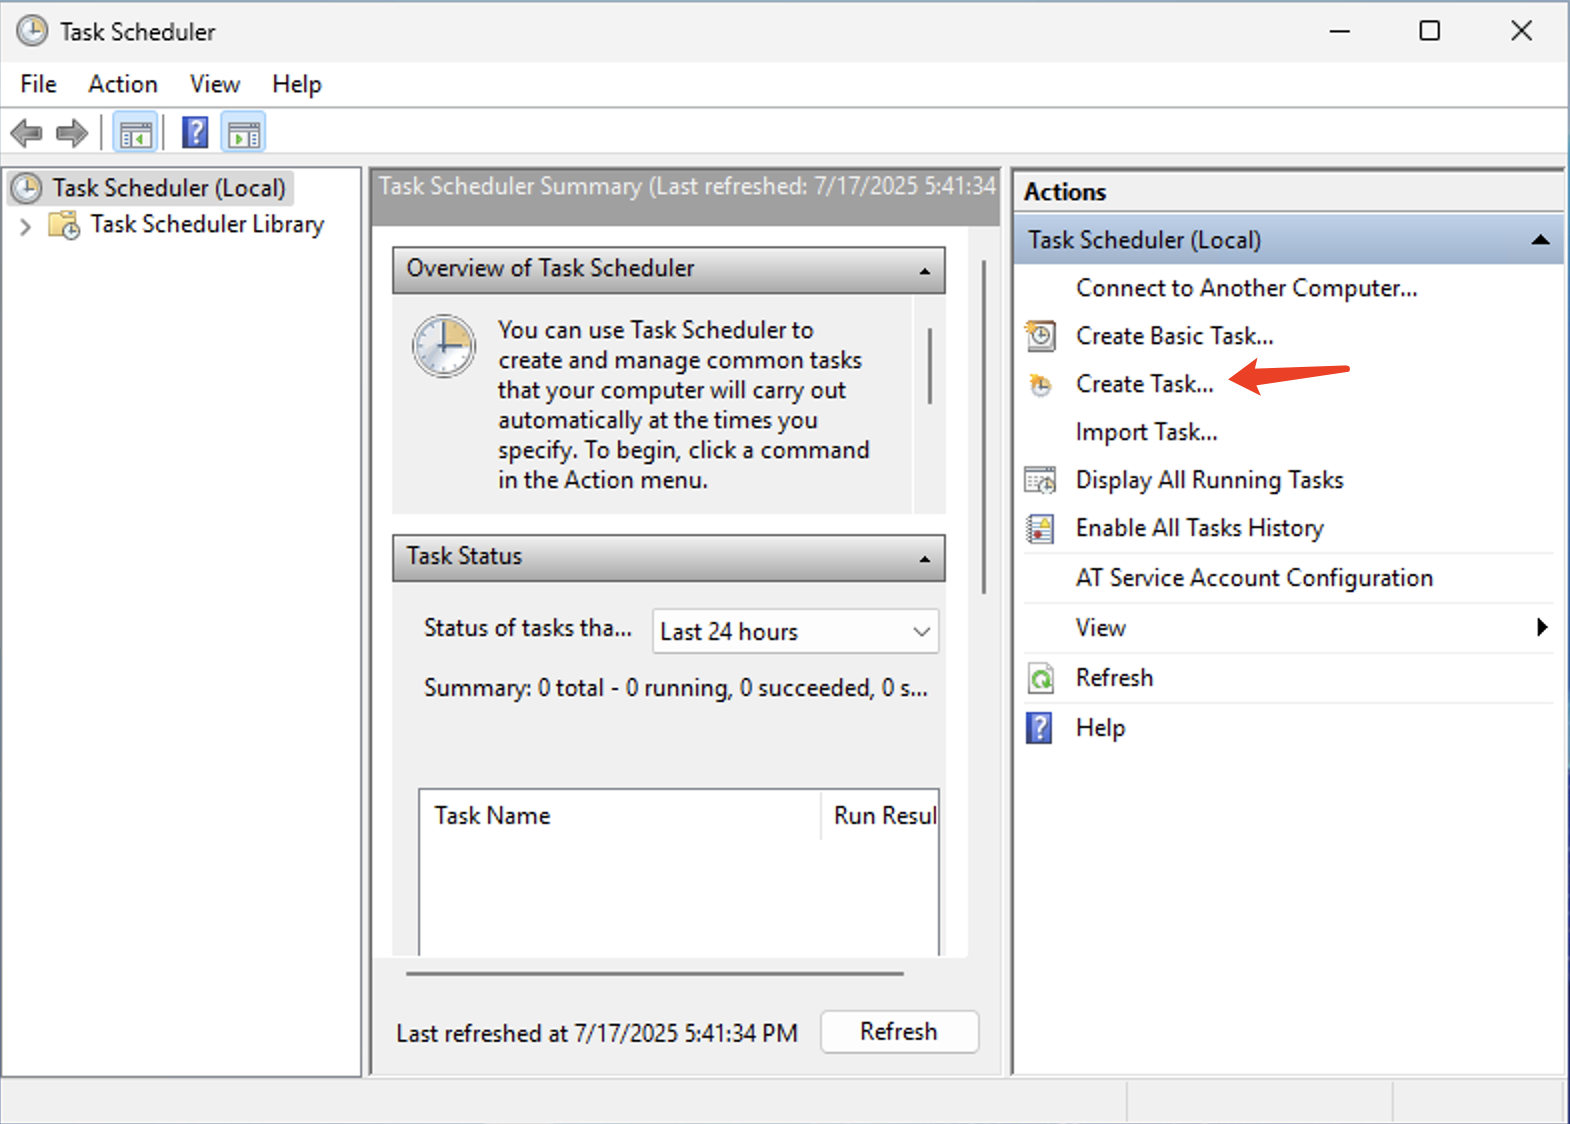
-
In the "General" tab, set the task name (e.g.,
JuiceFS_AutoMount) and check "Run with highest privileges".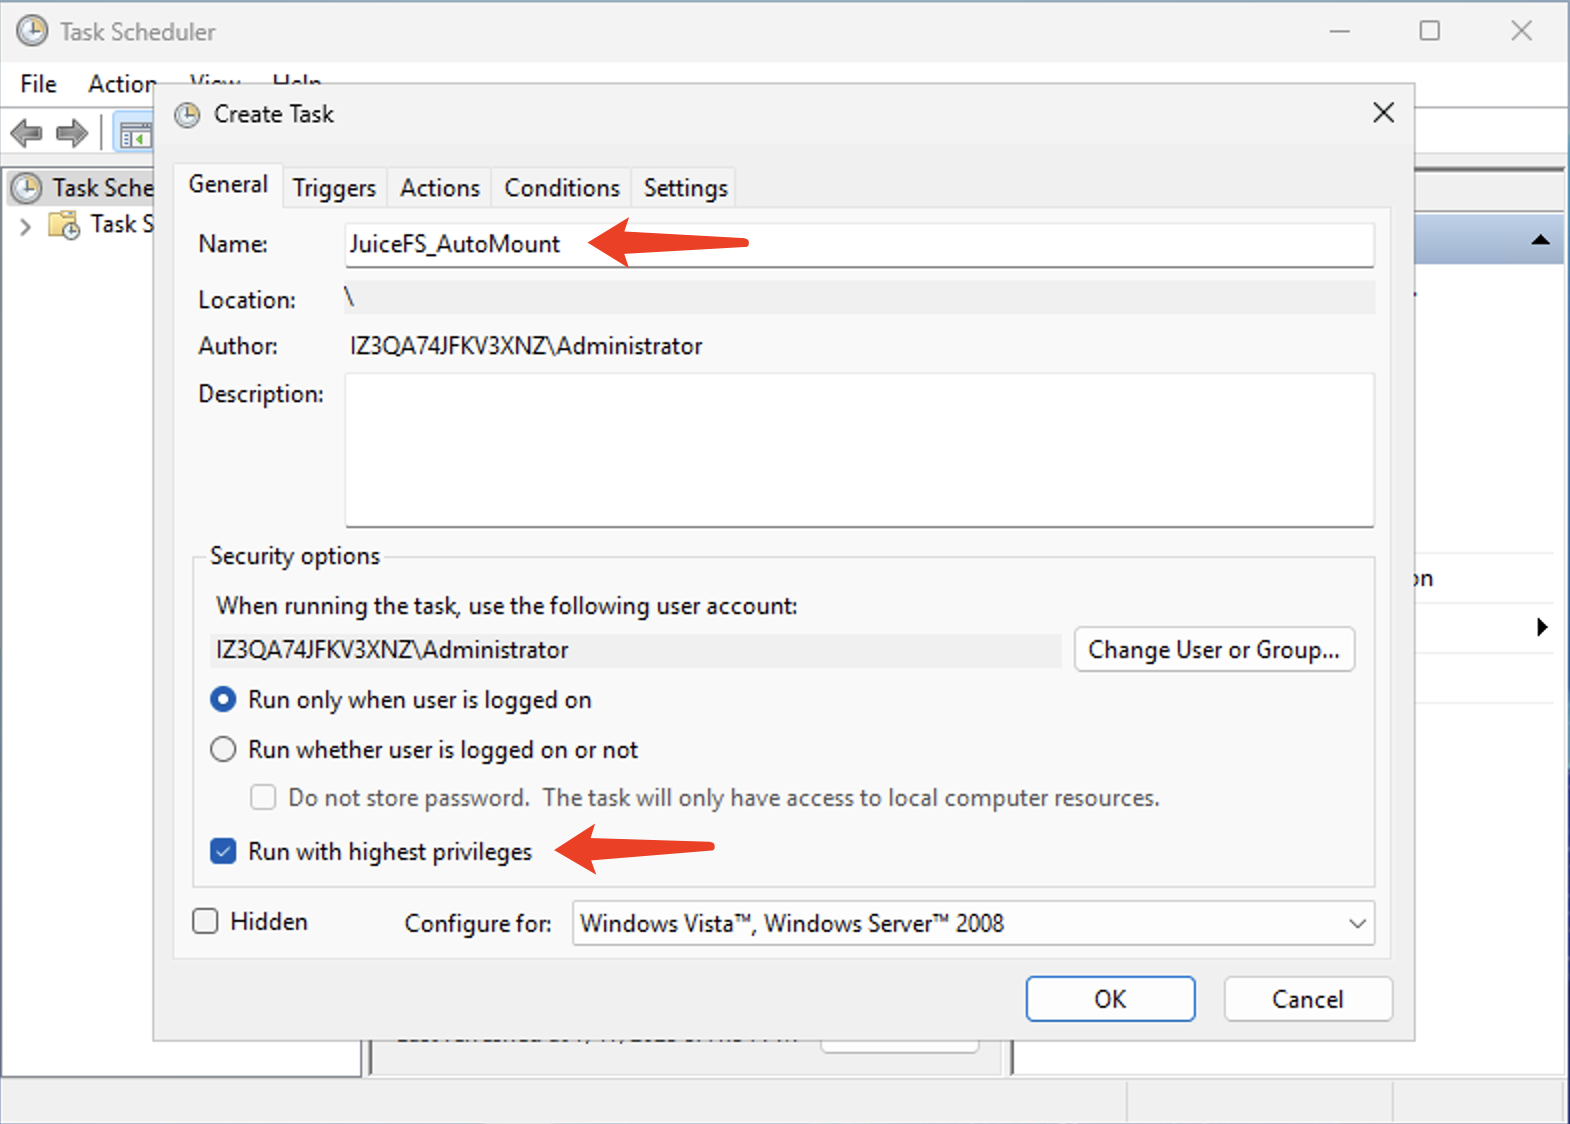
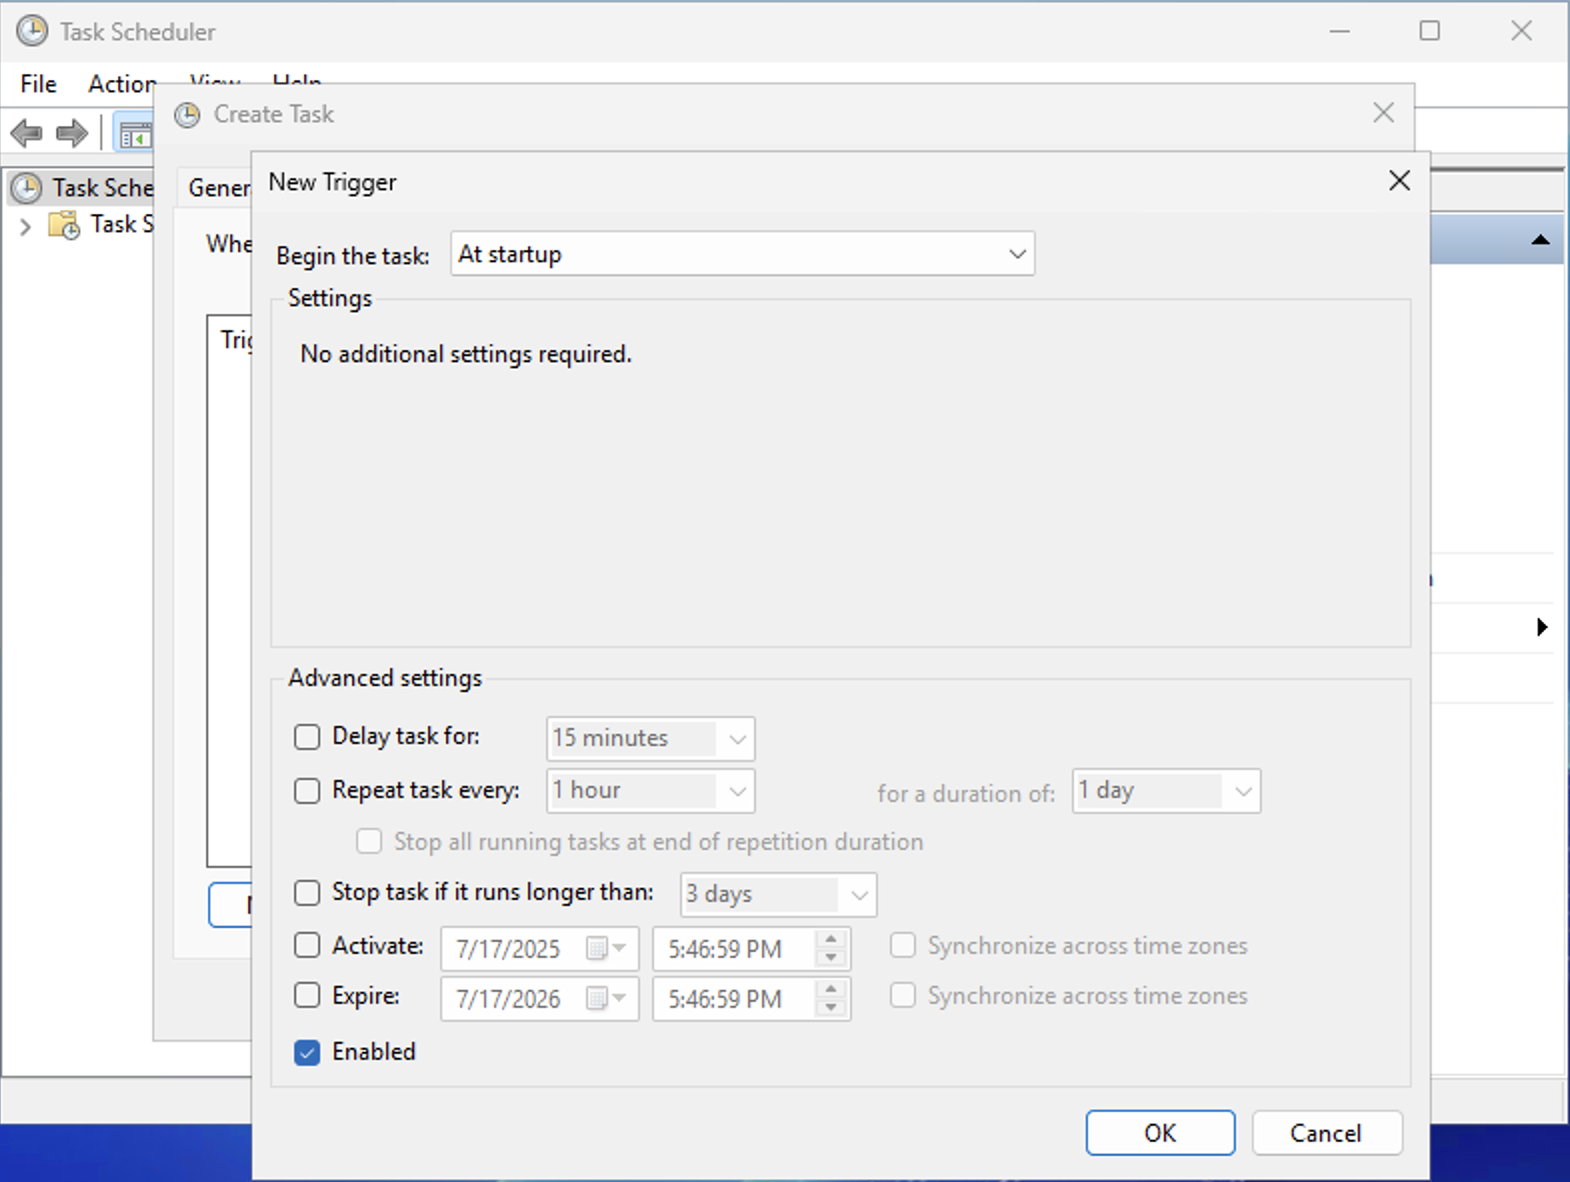
-
Switch to the "Triggers" tab, click "New", and select "At system startup" as the trigger.
-
Switch to the "Actions" tab, click "New", and fill in:
- Program/script: Browse to select the JuiceFS client path (e.g.,
C:\juicefs\juicefs.exe). - Arguments: Enter the mount command parameters. It is recommended to use system environment variables for the metadata engine password to avoid plain text input here.
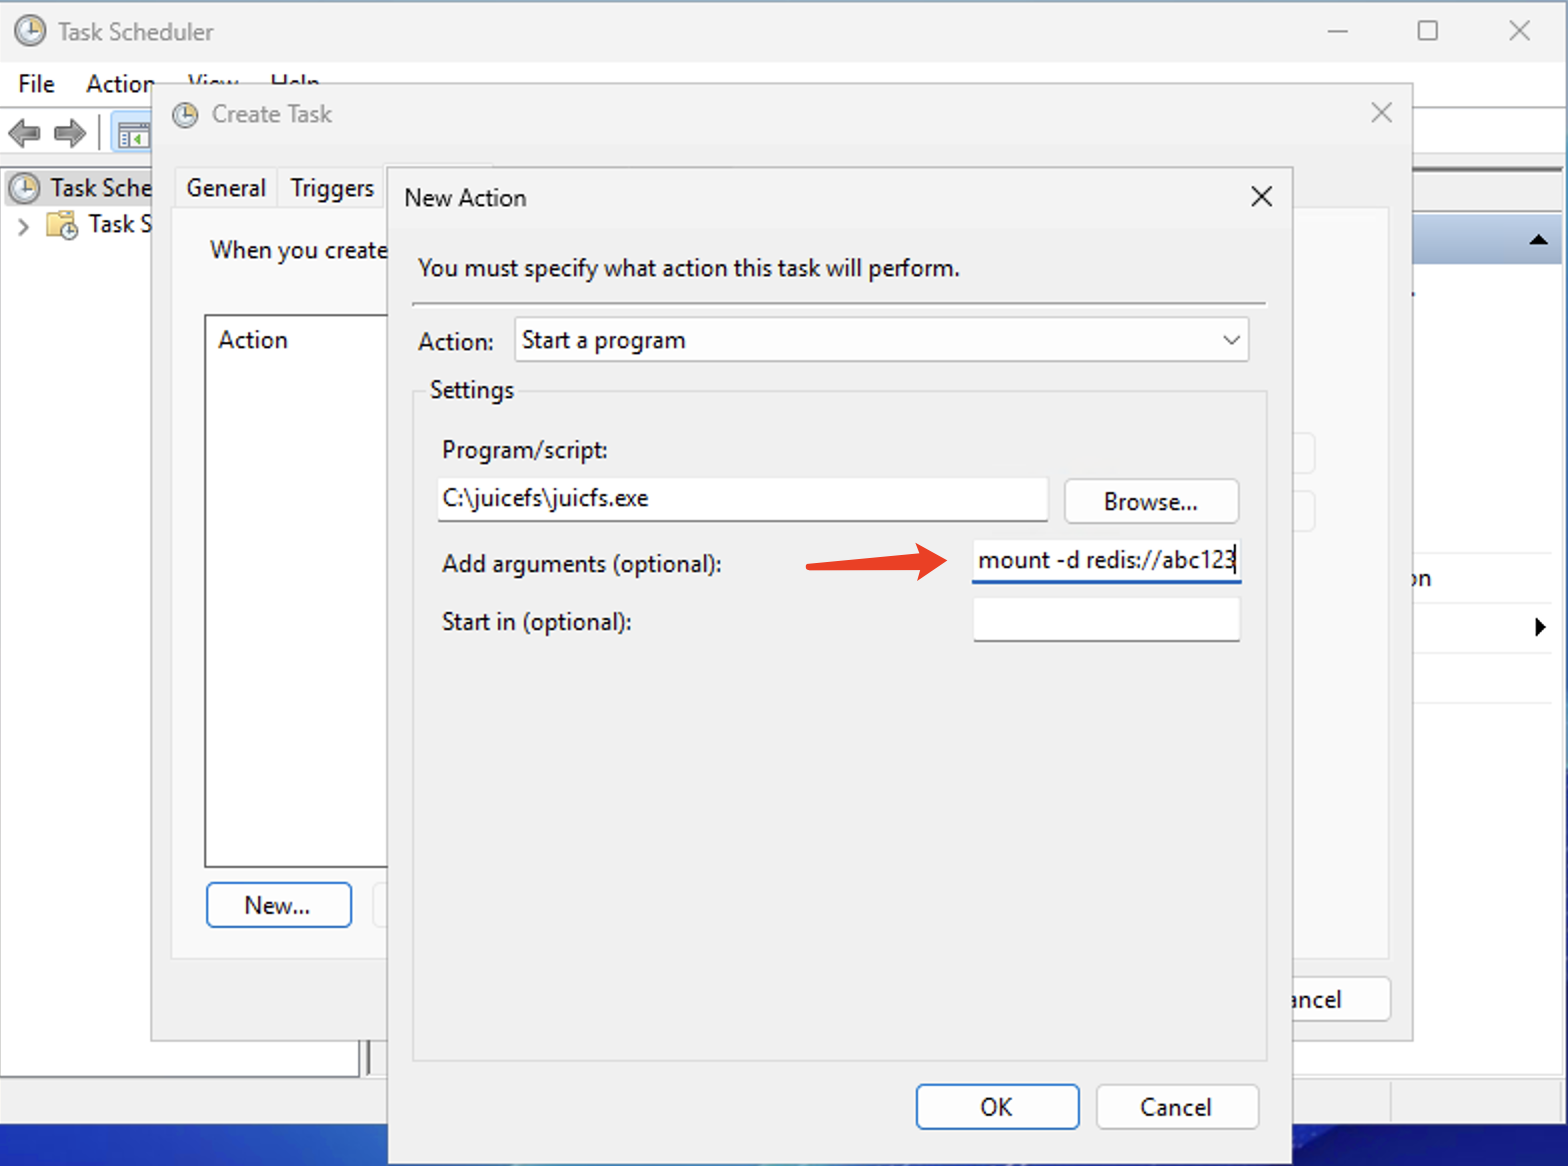
- Program/script: Browse to select the JuiceFS client path (e.g.,
-
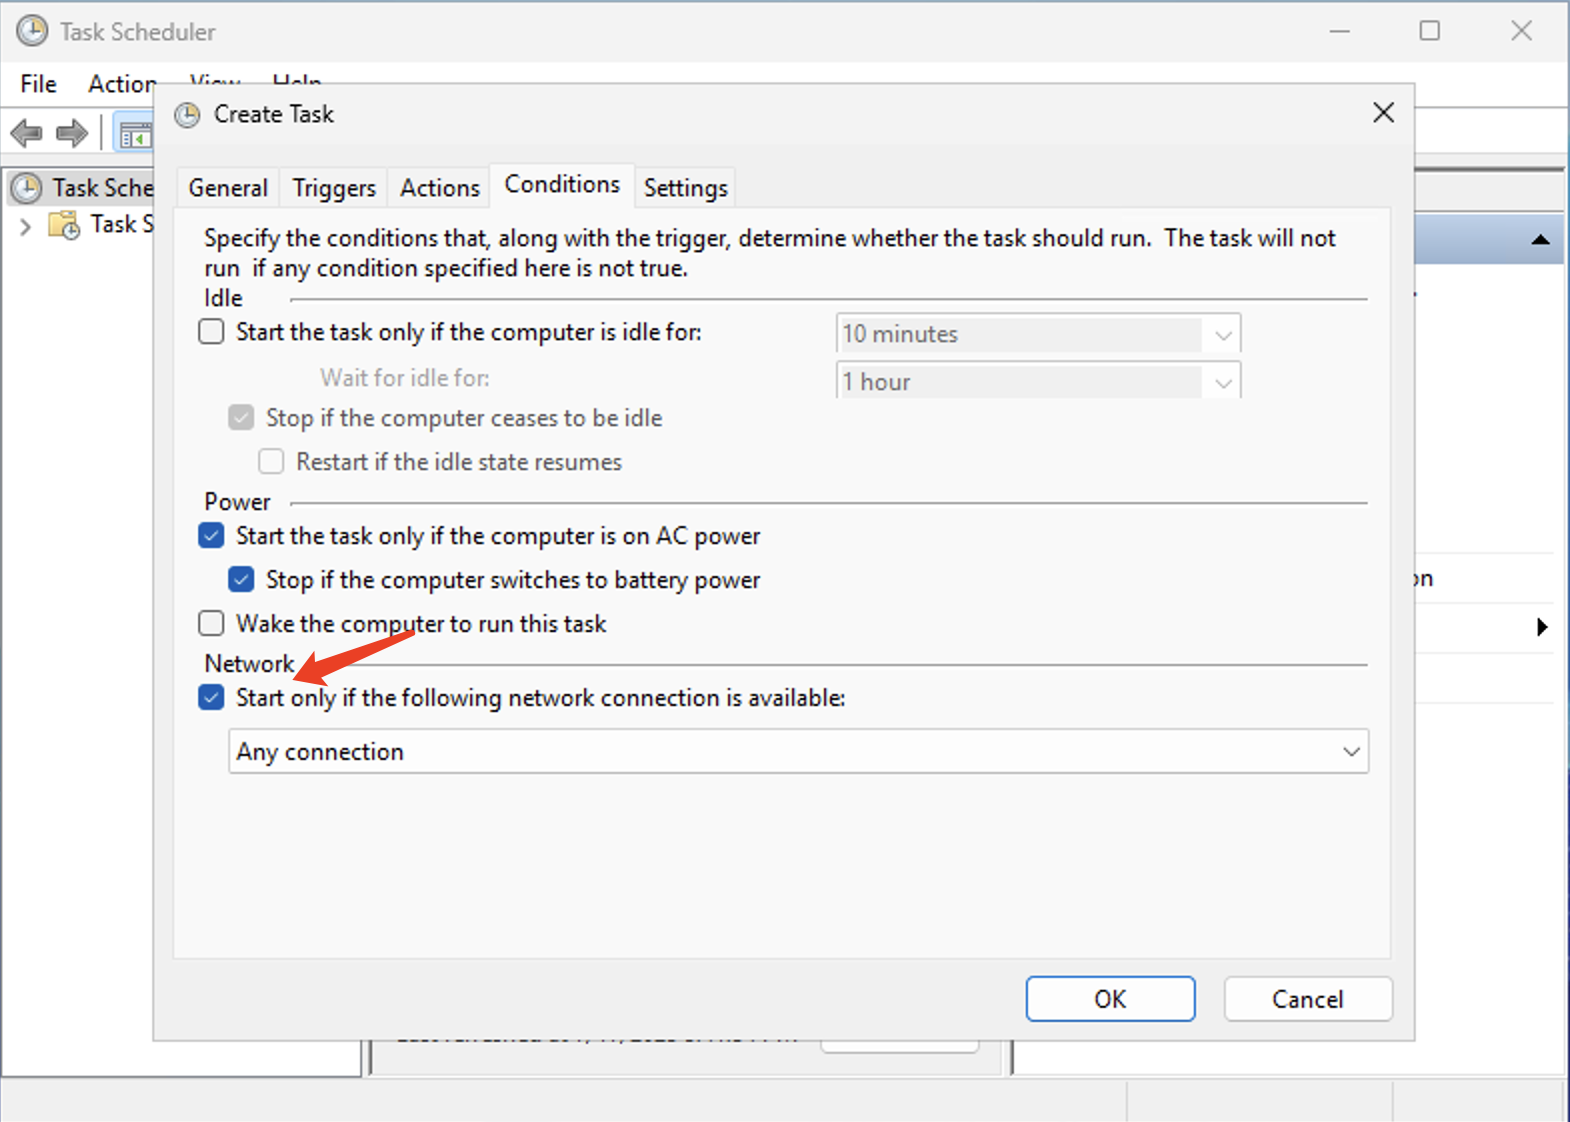
In the "Conditions" tab, check "Start only if the network connection is available" to ensure the mount operation runs when the network is ready.
-
Click "OK" to save the task.
Notes:
- Ensure the mount command parameters are correct; do not include the password in the command (it is stored in environment variables).
- To unmount the file system: right-click the mounted drive letter and select "Disconnect".