Use JuiceFS on K3s
K3s is a functionally optimized lightweight Kubernetes distribution that is fully compatible with Kubernetes.In other words, almost all operations performed on Kubernetes can also be executed on K3s. K3s packages the entire container orchestration system into a binary program with a size of less than 100MB, significantly reducing the environment dependencies and installation steps required to deploy Kubernetes production clusters. Compared to Kubernetes, K3s has lower performance requirements for the operating system.
In this article, we will build a K3s cluster with two nodes, install and configure JuiceFS CSI Driver for the cluster, and lastly create an NGINX Pod for verification.
Deploy a K3s cluster
K3s has very low minimum requirements for hardware:
- Memory: 512MB+ (recommend 1GB+)
- CPU: 1 core
When deploying a production cluster, it is recommended to start with a minimum hardware configuration of 4 cores and 8GB of memory per node. For more detailed information, please refer to the Hardware Requirements documentation.
K3s server node
The IP address of the server node is: 192.168.1.35
You can use the official script provided by K3s to deploy the server node on a regular Linux distribution.
curl -sfL https://get.k3s.io | sh -
After the deployment is successful, the K3s service will automatically start, and kubectl and other tools will also be installed at the same time.
You can execute the following command to view the status of the node:
$ sudo kubectl get nodes
NAME     STATUS   ROLES                  AGE   VERSION
k3s-s1   Ready    control-plane,master   28h   v1.21.4+k3s1
Get the node-token:
sudo -u root cat /var/lib/rancher/k3s/server/node-token
K3s worker node
The IP address of the worker node is: 192.168.1.36
Execute the following command and change the value of K3S_URL to the IP or domain name of the server node (the default port is 6443). Replace the value of K3S_TOKEN with the node-token obtained from the server node.
curl -sfL https://get.k3s.io | K3S_URL=http://192.168.1.35:6443 K3S_TOKEN=K1041f7c4fabcdefghijklmnopqrste2ec338b7300674f::server:3d0ab12800000000000000006328bbd80 sh -
After the deployment is successful, go back to the server node to check the node status:
$ sudo kubectl get nodes
NAME     STATUS   ROLES                  AGE   VERSION
k3s-s1   Ready    control-plane,master   28h   v1.21.4+k3s1
k3s-n1   Ready    <none>                 28h   v1.21.4+k3s1
Install CSI Driver
It is consistent with the method of Use JuiceFS on Kubernetes. Therefore, you can install CSI Driver through Helm or kubectl.
Here we use kubectl as an example. Execute the following command to install the CSI Driver:
kubectl apply -f https://raw.githubusercontent.com/juicedata/juicefs-csi-driver/master/deploy/k8s.yaml
Create Storage Class
Copy and modify the following code to create a configuration file, for example: juicefs-sc.yaml
apiVersion: v1
kind: Secret
metadata:
  name: juicefs-sc-secret
  namespace: kube-system
type: Opaque
stringData:
  name: "test"
  metaurl: "redis://juicefs.afyq4z.0001.use1.cache.amazonaws.com/3"
  storage: "s3"
  bucket: "https://juicefs-test.s3.us-east-1.amazonaws.com"
  access-key: "<your-access-key-id>"
  secret-key: "<your-access-key-secret>"
---
apiVersion: storage.k8s.io/v1
kind: StorageClass
metadata:
  name: juicefs-sc
provisioner: csi.juicefs.com
reclaimPolicy: Retain
volumeBindingMode: Immediate
parameters:
  csi.storage.k8s.io/node-publish-secret-name: juicefs-sc-secret
  csi.storage.k8s.io/node-publish-secret-namespace: kube-system
  csi.storage.k8s.io/provisioner-secret-name: juicefs-sc-secret
  csi.storage.k8s.io/provisioner-secret-namespace: kube-system
The stringData part of the configuration file is used to set the information related to the JuiceFS file system. It will create the file system based on the information you specify. When you need to use the pre-created file system in the storage class, you only need to fill in the name and metaurl, and the other items can be deleted or the value can be left blank.
Execute the command to deploy the storage class:
kubectl apply -f juicefs-sc.yaml
View storage class status:
$ sudo kubectl get sc
NAME                   PROVISIONER             RECLAIMPOLICY   VOLUMEBINDINGMODE      ALLOWVOLUMEEXPANSION   AGE
local-path (default)   rancher.io/local-path   Delete          WaitForFirstConsumer   false                  28h
juicefs-sc             csi.juicefs.com         Retain          Immediate              false                  28h
Note: A storage class is associated with a JuiceFS file system. You can create as many storage classes as you need, but be aware of the storage class name in the configuration file as the same name can cause conflicts.
Use JuiceFS to persist NGINX data
Next, deploy an NGINX Pod using a persistent storage declared by the JuiceFS storage class.
Deployment
Create a configuration file, for example: deployment.yaml
apiVersion: v1
kind: PersistentVolumeClaim
metadata:
  name: web-pvc
spec:
  accessModes:
    - ReadWriteMany
  resources:
    requests:
      storage: 10Pi
  storageClassName: juicefs-sc
---
apiVersion: apps/v1
kind: Deployment
metadata:
  name: nginx-run
  labels:
    app: nginx
spec:
  replicas: 2
  selector:
    matchLabels:
      app: nginx
  template:
    metadata:
      labels:
        app: nginx
    spec:
      containers:
        - name: nginx
          image: linuxserver/nginx
          ports:
            - containerPort: 80
          volumeMounts:
            - mountPath: /config
              name: web-data
      volumes:
        - name: web-data
          persistentVolumeClaim:
            claimName: web-pvc
Deploy it:
sudo kubectl apply -f deployment.yaml
Service
Create a configuration file, for example: service.yaml
apiVersion: v1
kind: Service
metadata:
  name: nginx-run-service
spec:
  selector:
    app: nginx
  ports:
    - name: http
      port: 80
Deploy it:
sudo kubectl apply -f service.yaml
Ingress
K3s is pre-installed with traefik-ingress by default. Create an ingress for NGINX through the following configuration. For example: ingress.yaml
apiVersion: networking.k8s.io/v1
kind: Ingress
metadata:
  name: nginx-run-ingress
  annotations:
    traefik.ingress.kubernetes.io/router.entrypoints: web
spec:
  rules:
    - http:
        paths:
          - pathType: Prefix
            path: "/web"
            backend:
              service:
                name: nginx-run-service
                port:
                  number: 80
Deploy it:
sudo kubectl apply -f ingress.yaml
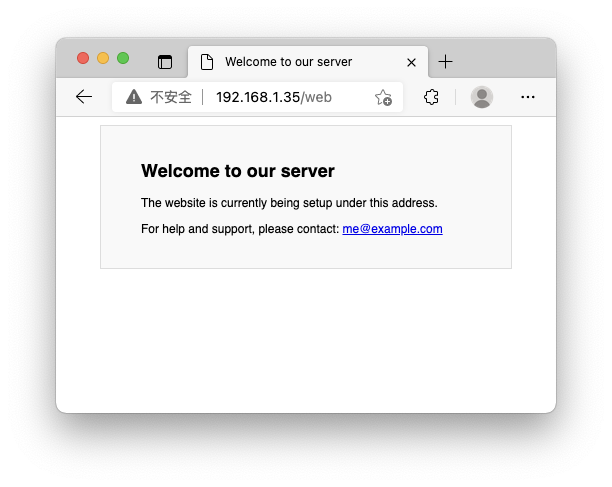
Visit
After the deployment is completed, use the host on the same LAN to access any cluster node, and then you will see the NGINX welcome page.
Next, check whether the container has successfully mounted JuiceFS, and execute the following command to check the Pod status:
$ sudo kubectl get pods
NAME                         READY   STATUS    RESTARTS   AGE
nginx-run-7d6fb7d6df-qhr2m   1/1     Running   0          28h
nginx-run-7d6fb7d6df-5hpv7   1/1     Running   0          24h
Executing the following command will show the file system mount status of any Pod:
$ sudo kubectl exec nginx-run-7d6fb7d6df-qhr2m -- df -Th
Filesystem     Type          Size  Used Avail Use% Mounted on
overlay        overlay        20G  3.2G   17G  17% /
tmpfs          tmpfs          64M     0   64M   0% /dev
tmpfs          tmpfs         2.0G     0  2.0G   0% /sys/fs/cgroup
JuiceFS:jfs    fuse.juicefs  1.0P  174M  1.0P   1% /config
/dev/sda1      ext4           20G  3.2G   17G  17% /etc/hosts
shm            tmpfs          64M     0   64M   0% /dev/shm
tmpfs          tmpfs         2.0G   12K  2.0G   1% /run/secrets/kubernetes.io/serviceaccount
tmpfs          tmpfs         2.0G     0  2.0G   0% /proc/acpi
tmpfs          tmpfs         2.0G     0  2.0G   0% /proc/scsi
tmpfs          tmpfs         2.0G     0  2.0G   0% /sys/firmware
As you can see, the file system named jfs has been mounted to the /config directory of the container, and the used space is 174M.
This indicates that the Pods in the cluster have been successfully configured and used JuiceFS to persist data.