Use JuiceFS on DigitalOcean
JuiceFS is designed for the cloud, using the cloud platform out-of-the-box storage and database services, and can be configured and put into use in as little as a few minutes. This article uses the DigitalOcean as an example to introduce how to quickly and easily install and use JuiceFS on the cloud computing platform.
Preparation
JuiceFS is powered by a combination of storage and database, so the things you need to prepare should include.
1. Cloud Server
The cloud server on DigitalOcean is called Droplet. If you already have a Droplet, you do not need to purchase a new one separately in order to use JuiceFS. Whichever cloud server needs to use JuiceFS storage on it, install the JuiceFS client for it.
Hardware Specifications
JuiceFS has no special hardware requirements, and any size Droplet can be used stably. However, it is recommended to choose a better performing SSD and reserve at least 1GB for JuiceFS to use as local cache.
Operating System
JuiceFS supports Linux, BSD, macOS and Windows. In this article, we will take Ubuntu Server 20.04 as an example.
2. Object Storage
JuiceFS uses object storage to store all your data, and using Spaces on DigitalOcean is the easiest solution. Spaces is an S3-compatible object storage service that works right out of the box. It is recommended to choose the same region as Droplet to get the best access speed and also to avoid additional traffic costs.
Of course, you can also use an object storage service from another platform or build it manually using Ceph or MinIO. In short, you are free to choose the object storage you want to use, just make sure that the JuiceFS client can access the object storage.
Here, we created a Spaces storage bucket named juicefs with the region sgp1 in Singapore, and it is accessible at:
https://juicefs.sgp1.digitaloceanspaces.com
In addition, you also need to create Spaces access keys in the API menu, which JuiceFS needs to access the Spaces API.
3. Database
Unlike normal file systems, JuiceFS stores all metadata corresponding to the data in a separate database, and the larger the size of the stored data, the better the performance. Currently, JuiceFS supports common databases such as Redis, TiKV, MySQL/MariaDB, PostgreSQL, SQLite, etc., while support for other databases is under continuous development. If the database you need is not supported at the moment, please submit issue feedback.
Each database has its own advantages and disadvantages in terms of performance, size and reliability, and you should choose according to the actual needs of the scenario.
Don't worry about the choice of database, the JuiceFS client provides a metadata migration feature that allows you to easily export and migrate metadata from one database to another.
For this article, we use DigitalOcean's Redis 6 database hosting service, choose Singapore, and select the same VPC private network as the existing Droplet. It takes about 5 minutes to create the Redis, and we follow the setup wizard to initialize the database.
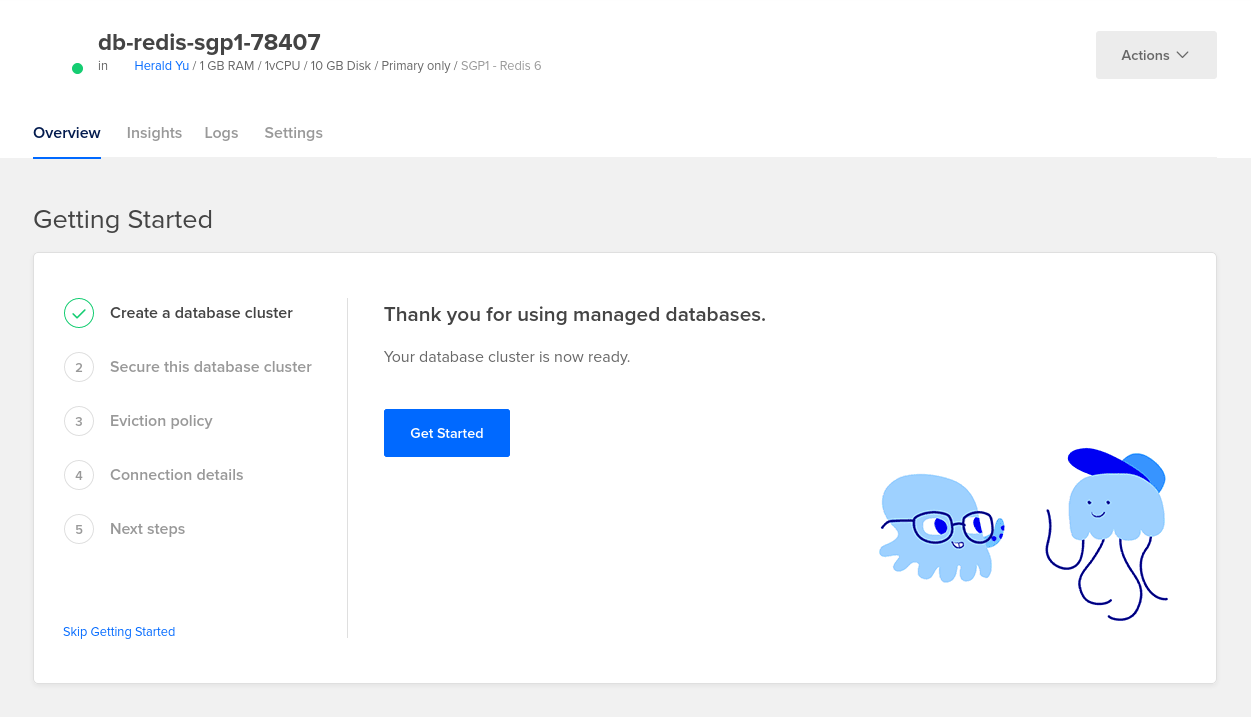
By default, the Redis allows all inbound connections. For security reasons, you should select the Droplet that have access to the Redis in the security setting section of the setup wizard in the Add trusted sources, that is, only allow the selected host to access the Redis.
In the setting of the eviction policy, it is recommended to select noeviction, that is, when the memory is exhausted, only errors are reported and no data is evictioned.
Note: In order to ensure the safety and integrity of metadata, please do not select
allkeys-lruandallkey-randomfor the eviction policy.
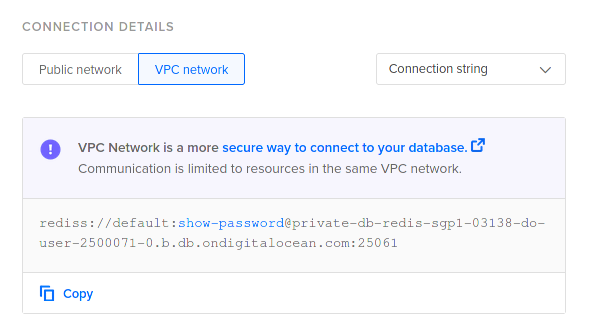
The access address of the Redis can be found in the Connection Details of the console. If all computing resources are in DigitalOcean, it is recommended to use the VPC private network for connection first, which can maximize security.
Installation and Use
1. Install JuiceFS client
We currently using Ubuntu Server 20.04, execute the following command to install the latest version of the client.
curl -sSL https://d.juicefs.com/install | sh -
Execute the command and see the command help information returned to juicefs, which means that the client is installed successfully.
$ juicefs

NAME:
   juicefs - A POSIX file system built on Redis and object storage.

USAGE:
   juicefs [global options] command [command options] [arguments...]

VERSION:
   0.16.2 (2021-08-25T04:01:15Z 29d6fee)

COMMANDS:
   format   format a volume
   mount    mount a volume
   umount   unmount a volume
   gateway  S3-compatible gateway
   sync     sync between two storage
   rmr      remove directories recursively
   info     show internal information for paths or inodes
   bench    run benchmark to read/write/stat big/small files
   gc       collect any leaked objects
   fsck     Check consistency of file system
   profile  analyze access log
   stats    show runtime stats
   status   show status of JuiceFS
   warmup   build cache for target directories/files
   dump     dump metadata into a JSON file
   load     load metadata from a previously dumped JSON file
   help, h  Shows a list of commands or help for one command

GLOBAL OPTIONS:
   --verbose, --debug, -v  enable debug log (default: false)
   --quiet, -q             only warning and errors (default: false)
   --trace                 enable trace log (default: false)
   --no-agent              disable pprof (:6060) agent (default: false)
   --help, -h              show help (default: false)
   --version, -V           print only the version (default: false)

COPYRIGHT:
   Apache License 2.0
In addition, you can also visit the JuiceFS GitHub Releases page to select other versions for manual installation.
2. Create a file system
To create a file system, use the format subcommand, the format is:
juicefs format [command options] META-URL NAME
The following command creates a file system named mystor:
$ juicefs format \
    --storage space \
    --bucket https://juicefs.sgp1.digitaloceanspaces.com \
    --access-key <your-access-key-id> \
    --secret-key <your-access-key-secret> \
    rediss://default:your-password@private-db-redis-sgp1-03138-do-user-2500071-0.b.db.ondigitalocean.com:25061/1 \
    mystor
Parameter Description:
--storage: Specify the data storage engine, here isspace, click here to view all supported storage.--bucket: Specify the bucket access address.--access-keyand--secret-key: Specify the secret key for accessing the object storage API.- The Redis managed by DigitalOcean needs to be accessed with TLS/SSL encryption, so it needs to use the
rediss://protocol header. The/1added at the end of the link represents the use of Redis's No. 1 database.
If you see output similar to the following, it means that the file system is created successfully.
2021/08/23 16:36:28.450686 juicefs[2869028] <INFO>: Meta address: rediss://default@private-db-redis-sgp1-03138-do-user-2500071-0.b.db.ondigitalocean.com:25061/1
2021/08/23 16:36:28.481251 juicefs[2869028] <WARNING>: AOF is not enabled, you may lose data if Redis is not shutdown properly.
2021/08/23 16:36:28.481763 juicefs[2869028] <INFO>: Ping redis: 331.706µs
2021/08/23 16:36:28.482266 juicefs[2869028] <INFO>: Data uses space://juicefs/mystor/
2021/08/23 16:36:28.534677 juicefs[2869028] <INFO>: Volume is formatted as {Name:mystor UUID:6b0452fc-0502-404c-b163-c9ab577ec766 Storage:space Bucket:https://juicefs.sgp1.digitaloceanspaces.com AccessKey:7G7WQBY2QUCBQC5H2DGK SecretKey:removed BlockSize:4096 Compression:none Shards:0 Partitions:0 Capacity:0 Inodes:0 EncryptKey:}
3. Mount a file system
To mount a file system, use the mount subcommand, and use the -d parameter to mount it as a daemon. The following command mounts the newly created file system to the mnt directory under the current directory:
sudo juicefs mount -d \
    rediss://default:your-password@private-db-redis-sgp1-03138-do-user-2500071-0.b.db.ondigitalocean.com:25061/1 mnt
The purpose of using sudo to perform the mount operation is to allow JuiceFS to have the authority to create a cache directory under /var/. Please note that when mounting the file system, you only need to specify the database address and the mount point, not the name of the file system.
If you see output similar to the following, it means that the file system is mounted successfully.
2021/08/23 16:39:14.202151 juicefs[2869081] <INFO>: Meta address: rediss://default@private-db-redis-sgp1-03138-do-user-2500071-0.b.db.ondigitalocean.com:25061/1
2021/08/23 16:39:14.234925 juicefs[2869081] <WARNING>: AOF is not enabled, you may lose data if Redis is not shutdown properly.
2021/08/23 16:39:14.235536 juicefs[2869081] <INFO>: Ping redis: 446.247µs
2021/08/23 16:39:14.236231 juicefs[2869081] <INFO>: Data use space://juicefs/mystor/
2021/08/23 16:39:14.236540 juicefs[2869081] <INFO>: Disk cache (/var/jfsCache/6b0452fc-0502-404c-b163-c9ab577ec766/): capacity (1024 MB), free ratio (10%), max pending pages (15)
2021/08/23 16:39:14.738416 juicefs[2869081] <INFO>: OK, mystor is ready at mnt
Use the df command to see the mounting status of the file system:
$ df -Th
File system    type             capacity used usable used%  mount point
JuiceFS:mystor fuse.juicefs       1.0P   64K  1.0P   1%     /home/herald/mnt
As you can see from the output information of the mount command, JuiceFS defaults to sets 1024 MB as the local cache. Setting a larger cache can make JuiceFS have better performance. You can set the cache (in MiB) through the --cache-size option when mounting a file system. For example, set a 20GB local cache:
sudo juicefs mount -d --cache-size 20000 \
    rediss://default:your-password@private-db-redis-sgp1-03138-do-user-2500071-0.b.db.ondigitalocean.com:25061/1 mnt
After the file system is mounted, you can store data in the ~/mnt directory just like using a local hard disk.
4. File system status
Use the status subcommand to view the basic information and connection status of a file system. You only need to specify the database URL.
$ juicefs status rediss://default:bn8l7ui2cun4iaji@private-db-redis-sgp1-03138-do-user-2500071-0.b.db.ondigitalocean.com:25061/1
2021/08/23 16:48:48.567046 juicefs[2869156] <INFO>: Meta address: rediss://default@private-db-redis-sgp1-03138-do-user-2500071-0.b.db.ondigitalocean.com:25061/1
2021/08/23 16:48:48.597513 juicefs[2869156] <WARNING>: AOF is not enabled, you may lose data if Redis is not shutdown properly.
2021/08/23 16:48:48.598193 juicefs[2869156] <INFO>: Ping redis: 491.003µs
{
  "Setting": {
    "Name": "mystor",
    "UUID": "6b0452fc-0502-404c-b163-c9ab577ec766",
    "Storage": "space",
    "Bucket": "https://juicefs.sgp1.digitaloceanspaces.com",
    "AccessKey": "7G7WQBY2QUCBQC5H2DGK",
    "SecretKey": "removed",
    "BlockSize": 4096,
    "Compression": "none",
    "Shards": 0,
    "Partitions": 0,
    "Capacity": 0,
    "Inodes": 0
  },
  "Sessions": [
    {
      "Sid": 1,
      "Heartbeat": "2021-08-23T16:46:14+08:00",
      "Version": "0.16.2 (2021-08-25T04:01:15Z 29d6fee)",
      "Hostname": "ubuntu-s-1vcpu-1gb-sgp1-01",
      "MountPoint": "/home/herald/mnt",
      "ProcessID": 2869091
    },
    {
      "Sid": 2,
      "Heartbeat": "2021-08-23T16:47:59+08:00",
      "Version": "0.16.2 (2021-08-25T04:01:15Z 29d6fee)",
      "Hostname": "ubuntu-s-1vcpu-1gb-sgp1-01",
      "MountPoint": "/home/herald/mnt",
      "ProcessID": 2869146
    }
  ]
}
5. Unmount a file system
Use the umount subcommand to unmount a file system, for example:
sudo juicefs umount ~/mnt
Note: Force unmount the file system in use may cause data damage or loss, please be careful to operate.
6. Auto-mount on boot
Please refer to "Mount JuiceFS at Boot Time" for more details.
7. Multi-host shared
The JuiceFS file system supports being mounted by multiple cloud servers at the same time, and there is no requirement for the geographic location of the cloud server. It can easily realize the real-time data sharing of servers between the same platform, between cross-cloud platforms, and between public and private clouds.
Not only that, the shared mount of JuiceFS can also provide strong data consistency guarantee. When multiple servers mount the same file system, the writes confirmed on the file system will be visible in real time on all hosts.
To use the shared mount, it is important to ensure that the database and object storage service that make up the file system can be accessed by each host to mount it. In the demonstration environment of this article, the Spaces object storage is open to the entire Internet, and it can be read and written through the API as long as the correct access key is used. But for the Redis database managed by DigitalOcean, you need to configure the access strategy reasonably to ensure that the hosts outside the platform have access permissions.
When you mount the same file system on multiple hosts, first create a file system on any host, then install the JuiceFS client on every hosts, and use the same database address to mount it with the mount command. Pay special attention to the fact that the file system only needs to be created once, and there should be no need to repeat file system creation operations on other hosts.