As you use JuiceFS over time, you may find yourself managing multiple file systems across various databases and object storage services. Some of these setups may be cloud-based, while others are local, or a combination of both. Among these, some file systems store files, while others were created temporarily for testing purposes. Managing multiple file systems can become confusing, especially when several are created within the same database instance.
For example, you might have file systems in both the 0 and 1 databases of a Redis instance—one actively used and the other for testing. When you need to delete the test file system, there’s a risk of accidentally deleting the active one. In this article, I’ll share some practical tips for managing these situations. I hope this post will be helpful to other JuiceFS users.
Prerequisite knowledge
Before diving into the tips, let’s briefly go over some basic concepts in JuiceFS to help you better understand the solutions.
As shown in the diagram below, JuiceFS uses a storage architecture where data and metadata are stored separately. Data is stored in object storage, while metadata is stored in a database.
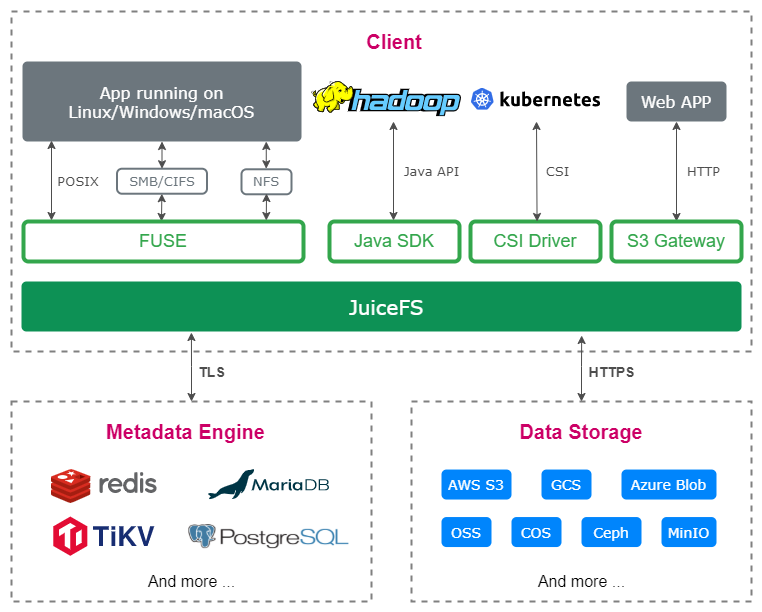
From a management perspective, this setup involves managing both the database and the object storage.
Scenario 1: Verifying databases used by JuiceFS
If you enjoy experimenting with different databases as metadata engines for JuiceFS, you might accumulate multiple databases over time. In such situations, it can be challenging to determine which of these databases are being used by JuiceFS.
There are two main ways to determine this:
- Using the JuiceFS client for checks
- Using the database client for checks
Both methods work, but some databases are better suited to the first method, while others are better suited to the second.
Databases suited for JuiceFS client checks
For standalone databases like SQLite3 or Badger, using the JuiceFS client is more appropriate. Since each database corresponds to a single JuiceFS file system, if the JuiceFS client can connect to the database, it can check if the database is being used by JuiceFS.
For example, if you find a file named my.db in a directory on your local computer, you might not be sure whether it's metadata for a JuiceFS file system or a database for another application. In this case, you can use the JuiceFS client’s status command to check.
juicefs status sqlite3://my.db
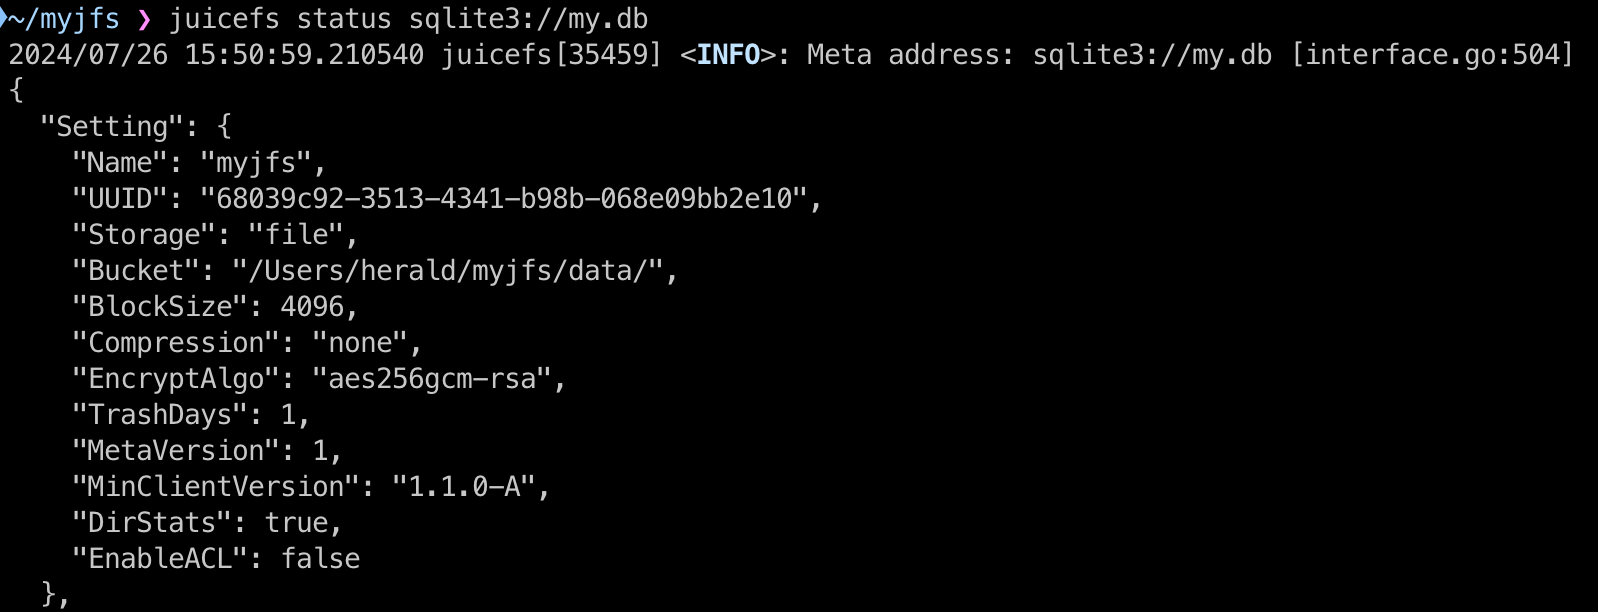
The JSON output from the command includes details like the file system's name, UUID, storage type, and object storage. This information confirms whether the database is a metadata engine for a JuiceFS file system.
If the JSON output does not appear and the message "database is not formatted" is displayed, then the database is not being used as a JuiceFS metadata engine.

Similar to SQLite3, Badger is also a standalone database, but it stores its data in a directory rather than a single file.
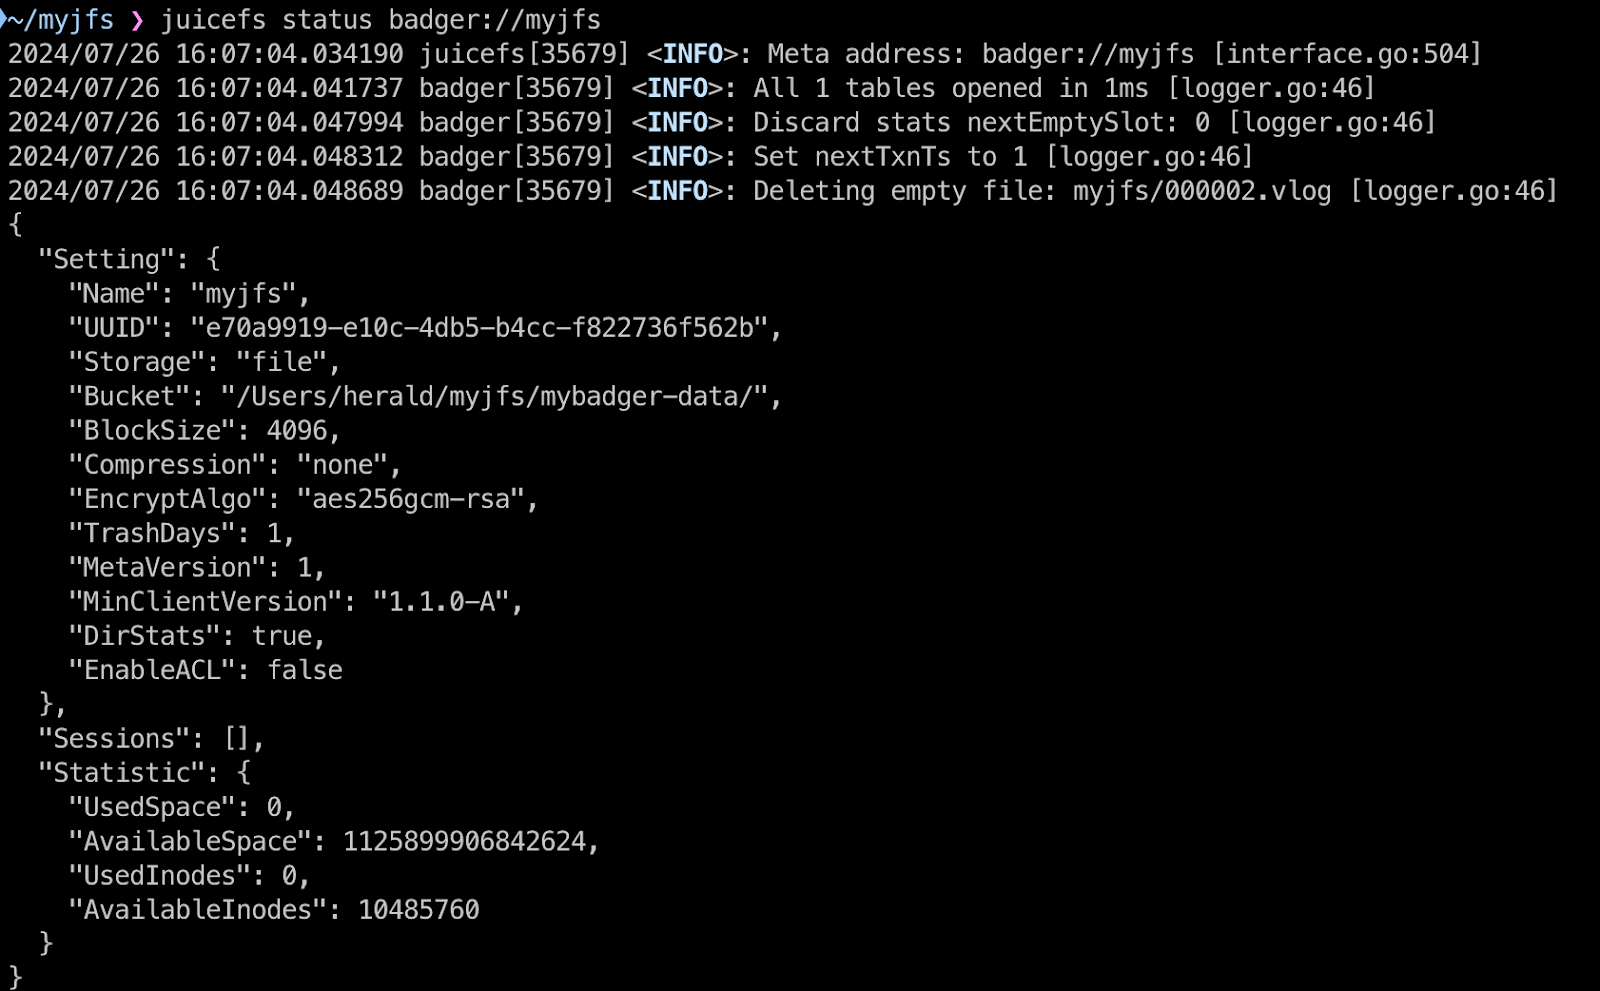
If you come across a directory named myjfs and can’t remember whether it’s a normal directory or a Badger database, you can use the JuiceFS client’s status command to check:
juicefs status badger://myjfs
Databases suited for database client checks
It’s possible to use the JuiceFS client for these checks. However, when dealing with multiple databases or when you can’t recall which databases are in use, it may be more intuitive and convenient to use a database client to check network databases.
Redis
By default, a Redis instance has 16 databases numbered from 0 to 15. If you didn’t record the purpose of each database at the time of creation, it might be difficult to determine later which one is being used by JuiceFS.
For example, say you have the following Redis instance:
- Address: 192.168.1.88
- Port: 6379
- Password: password
If you’re unsure which database, if any, is being used by JuiceFS, the simplest way is to use the redis-cli client to connect to the Redis instance and check each database one by one:
# Connect to the Redis instance.
redis-cli -h 192.168.1.88 -p 6379 -a password

# Check which databases are storing data.
192.168.1.88> info keyspace
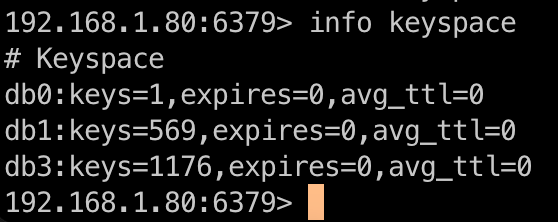
Using the info keyspace command, you can see that db0, db1, and db3 databases have stored data. Next, you can check each of these databases for JuiceFS usage by running the get setting command.
As shown in the figure below, db0 does not contain JuiceFS information. This indicates it’s not being used by JuiceFS. However, db1 and db3 do contain JuiceFS information, indicating they are in use by JuiceFS.

PostgreSQL, MySQL, and MariaDB
For PostgreSQL, MySQL, and MariaDB, many graphical client tools are available, such as pgAdmin, Adminer, and Navicat. They allow you to visually view tables, data, and other information.
Personally, I prefer using Adminer. It’s a lightweight database management tool that can be deployed via Docker and accessed through a web browser. It supports all three of these databases.
Assuming Docker is already installed on your local machine, you can deploy Adminer with the following command:
docker run -d -p 8080:8080 --name adminer adminer
Once deployed, you can access Adminer at http://localhost:8080.
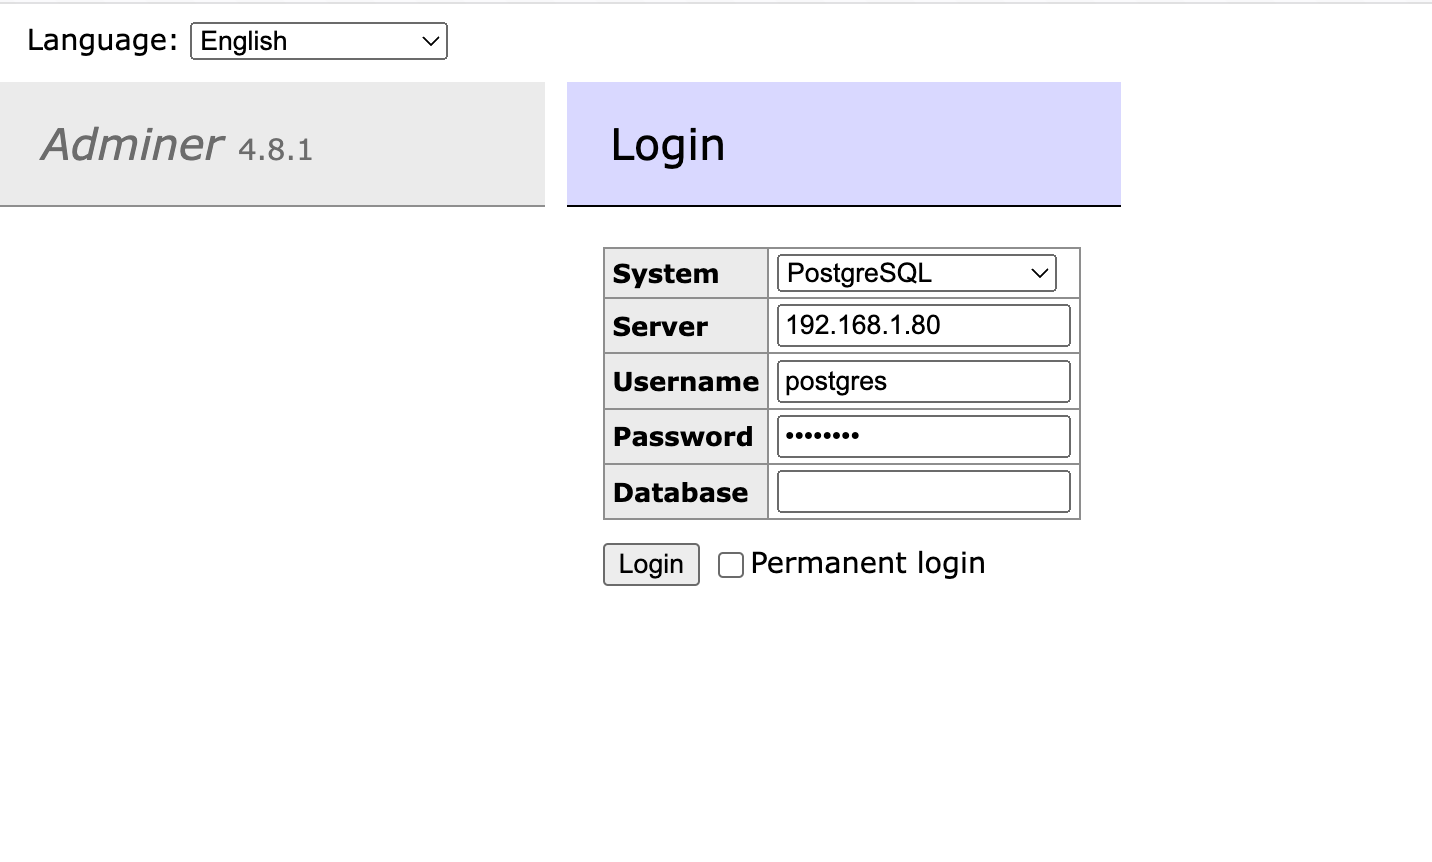
For example, after connecting to PostgreSQL, you can easily view tables and other data.
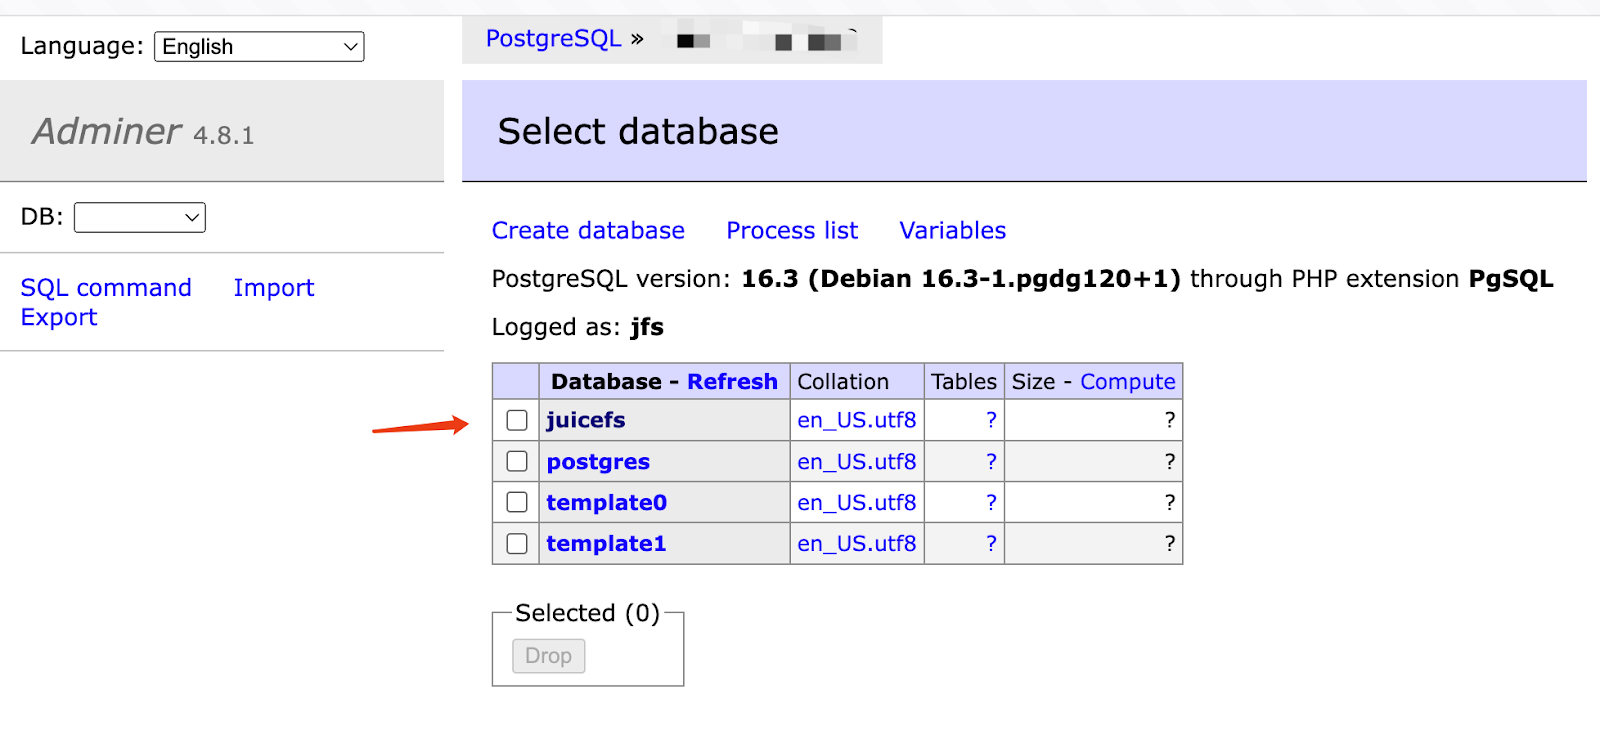
If you're unsure which database is used by JuiceFS, you can verify it by checking the tables within each database.
Generally, JuiceFS tables have names that begin with jfs_.
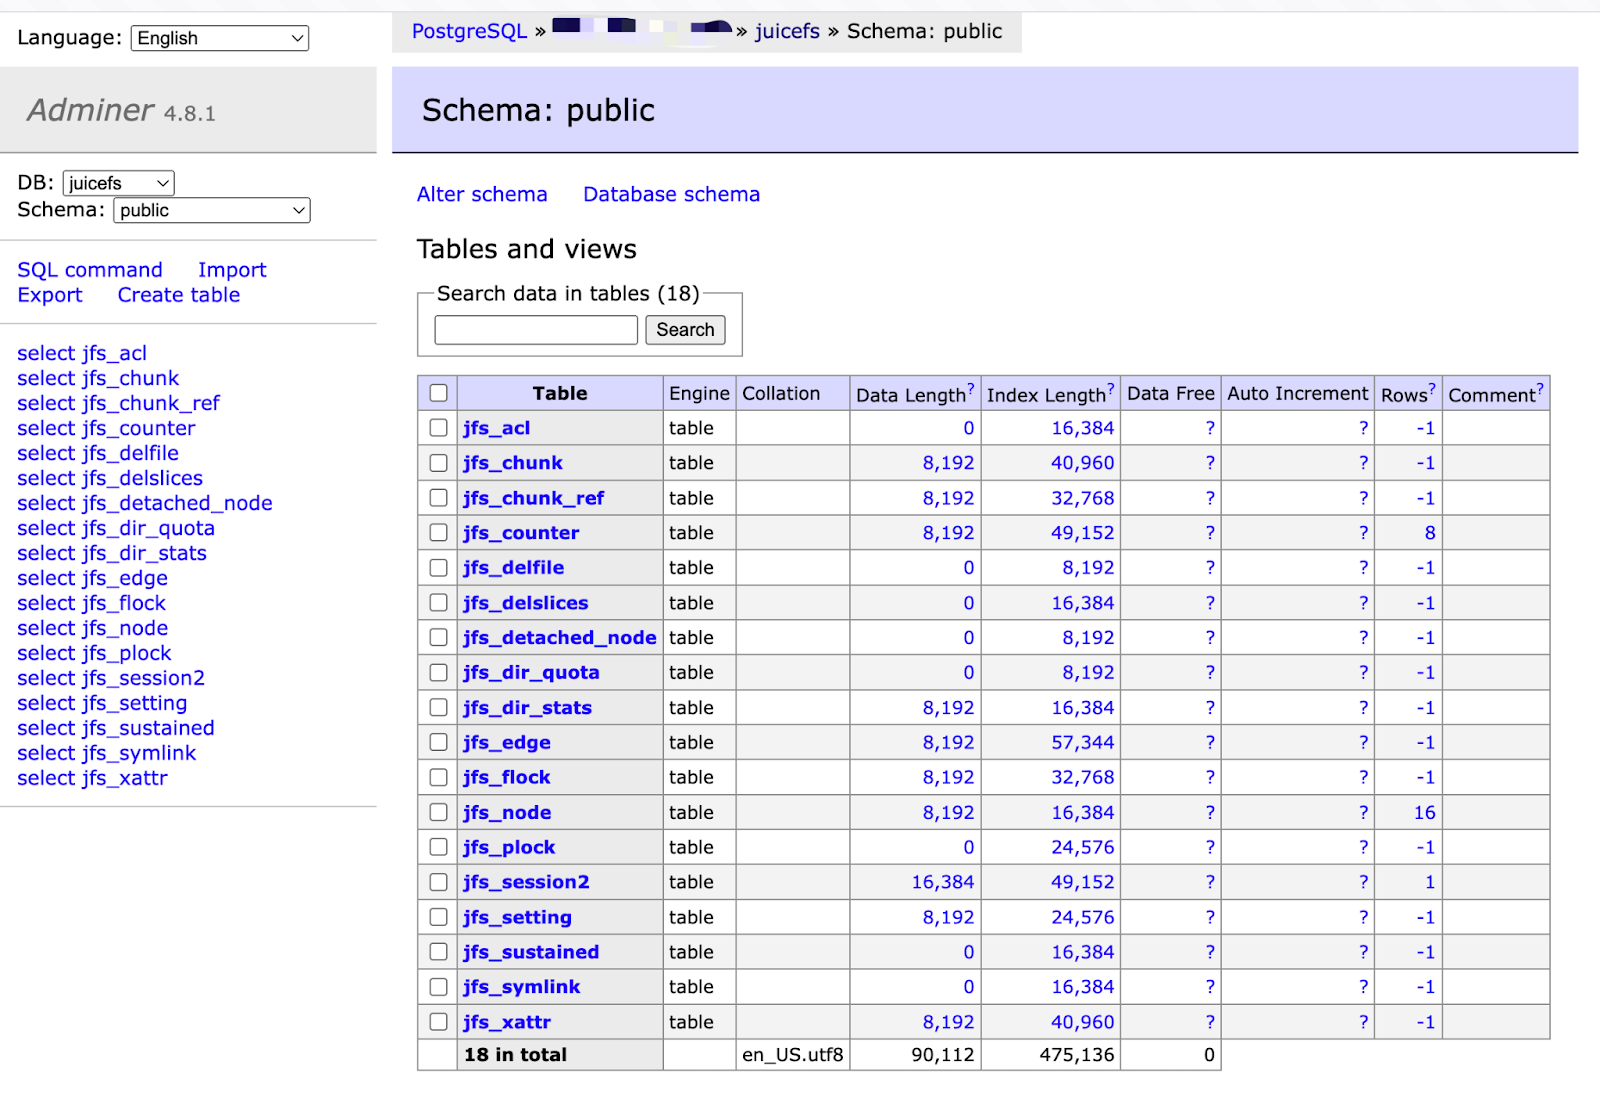
For databases such as MySQL or MariaDB, you can perform this check in a similar manner. Simply log into Adminer, select the appropriate database, and look for tables with the jfs_ prefix.
JuiceFS also supports other databases like TiKV, etcd, and FoundationDB. The method to verify whether JuiceFS uses these databases is similar. Detailed instructions for each type are not covered here.
Scenario 2: Verifying object storage used by JuiceFS
In the JuiceFS file system, the metadata engine records all file information, while the object storage stores the actual files. Both components work together, and neither can function independently.
To determine which object storage is used by JuiceFS, you can identify the metadata engine for the file system. By running the juicefs status command, you can find the associated object storage.
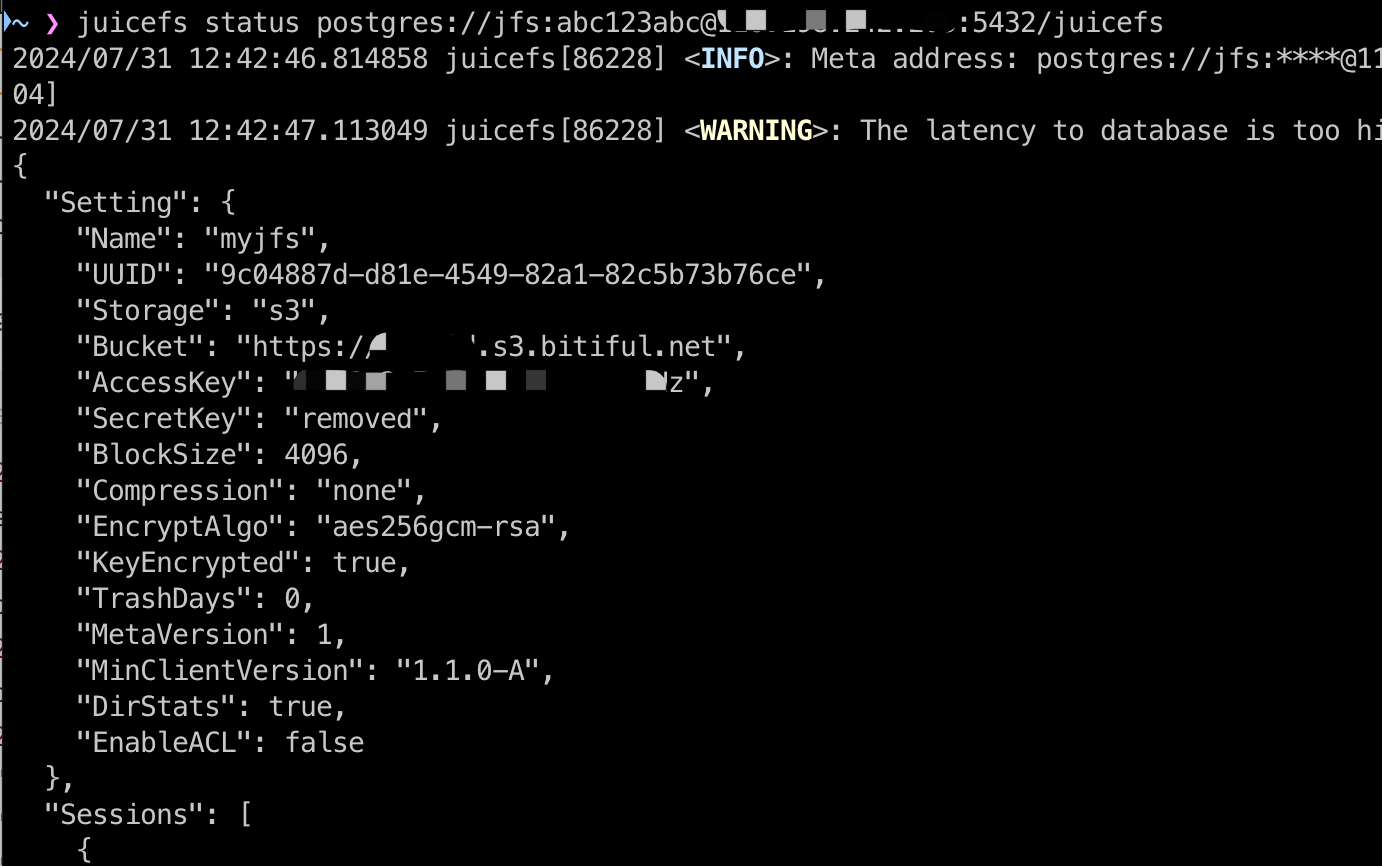
In the command output, check the bucket section to see which object storage is being used. If you have multiple accounts on the same cloud platform, you’d better examine the bucket content directly from the cloud provider’s file manager.
JuiceFS creates a folder in the root directory of the bucket with the same name as the file system. Inside this directory, look for a file named juicefs_uuid. It’s key to identifying the JuiceFS file system.
In addition, you can see chunks and meta directories, which store file data blocks and metadata backups, respectively. These characteristics help you confirm whether a bucket is associated with a JuiceFS file system.
Summary
This guide covers how to determine if a database or object storage is used by JuiceFS. By following these steps, you can effectively manage JuiceFS file systems and avoid accidental deletions or other issues.
Recommendations for creating JuiceFS file systems:
- Database naming: When using a standalone database for the metadata engine, choose meaningful and concise names. This practice simplifies identification and future use.
- Exclusive use: For file systems expected to be used long-term, you’d better allocate databases and buckets exclusively to JuiceFS. Avoid sharing these resources with other applications to prevent potential conflicts and errors.
- Naming conventions: Define an easily recognizable name for the file system, such as including the
jfsprefix (for example,my-jfsortest-jfs). This helps with management and identification.
If you have any questions for this article, feel free to join JuiceFS discussions on GitHub and our community on Slack.


