


JuiceFS S3 Gateway is developed based on MinIO Gateway. It implemented the S3 API, allowing you to access and manage data in the JuiceFS file system through any S3-compatible client.
JuiceFS 1.2 implemented two new features for JuiceFS S3 Gateway: Identity and Access Management (IAM) and bucket event notifications. This guide will introduce how to use the two features.
Why use S3 Gateway when the underlying storage is object storage?
A common question users have about JuiceFS S3 Gateway is: why use it if the underlying storage is already object storage?
Although JuiceFS uses object storage as its underlying storage, it builds a distributed file system with a unique data format and storage structure. This is fundamentally different from regular object storage. In addition, JuiceFS provides multi-protocol access, caching capabilities, and capacity quotas. These are not typically available in standard object storage.
What’ new for S3 Gateway in JuiceFS 1.2
Initially, the development focus of JuiceFS S3 Gateway was on implementing the S3 API. In the recently released JuiceFS 1.2, we’ve adopted user requests from the community and implemented two new features:
- IAM: It manages and controls user access to storage resources. Administrators can create and manage multiple user accounts, define and apply access policies. This ensures users and groups can only access authorized data.
- Bucket event notifications: It monitors events such as object creation, deletion, and modification within storage buckets and notifies specified services about these events. For example, it can be configured to send notifications to message queues, HTTP endpoints, or other compatible services. This facilitates automated workflows, real-time data change monitoring, and system integration.
Next, we’ll introduce how to use these two features.
Preparation
Before introducing the new features, you need to prepare the new version of the JuiceFS client and MinIO Client.
JuiceFS Client
Ensure you are using JuiceFS 1.2 or later. As of this writing, the latest version is v1.2.0-rc1, which you can download from the Github Release page. Here is an example for x86_64 Linux:
# Create and enter the download directory.
mkdir juicefs && cd juicefs

# Download the precompiled client.
curl -LO https://github.com/juicedata/juicefs/releases/download/v1.2.0-rc1/juicefs-1.2.0-rc1-linux-amd64.tar.gz

# Extract the client.
tar xvf juicefs-1.2.0-rc1-linux-amd64.tar.gz

# Install the client to the executable path.
sudo install juicefs /usr/local/bin
You also need to prepare a file system. Follow the Standalone Mode document to create one. Here, we assume a file system named "myjfs" created with Redis. Start S3 Gateway:
export MINIO_ROOT_USER=admin
export MINIO_ROOT_PASSWORD=abc123abc
juicefs gateway redis://your-redis.com/1 192.168.1.23:9898
JuiceFS 1.2 introduces a background running option for S3 Gateway. Use --background or -d to run the process in the background.
Visit http://192.168.1.23:9898 in the browser to open the WebUI.
Log in with the access key and secret key set in the environment variables above:
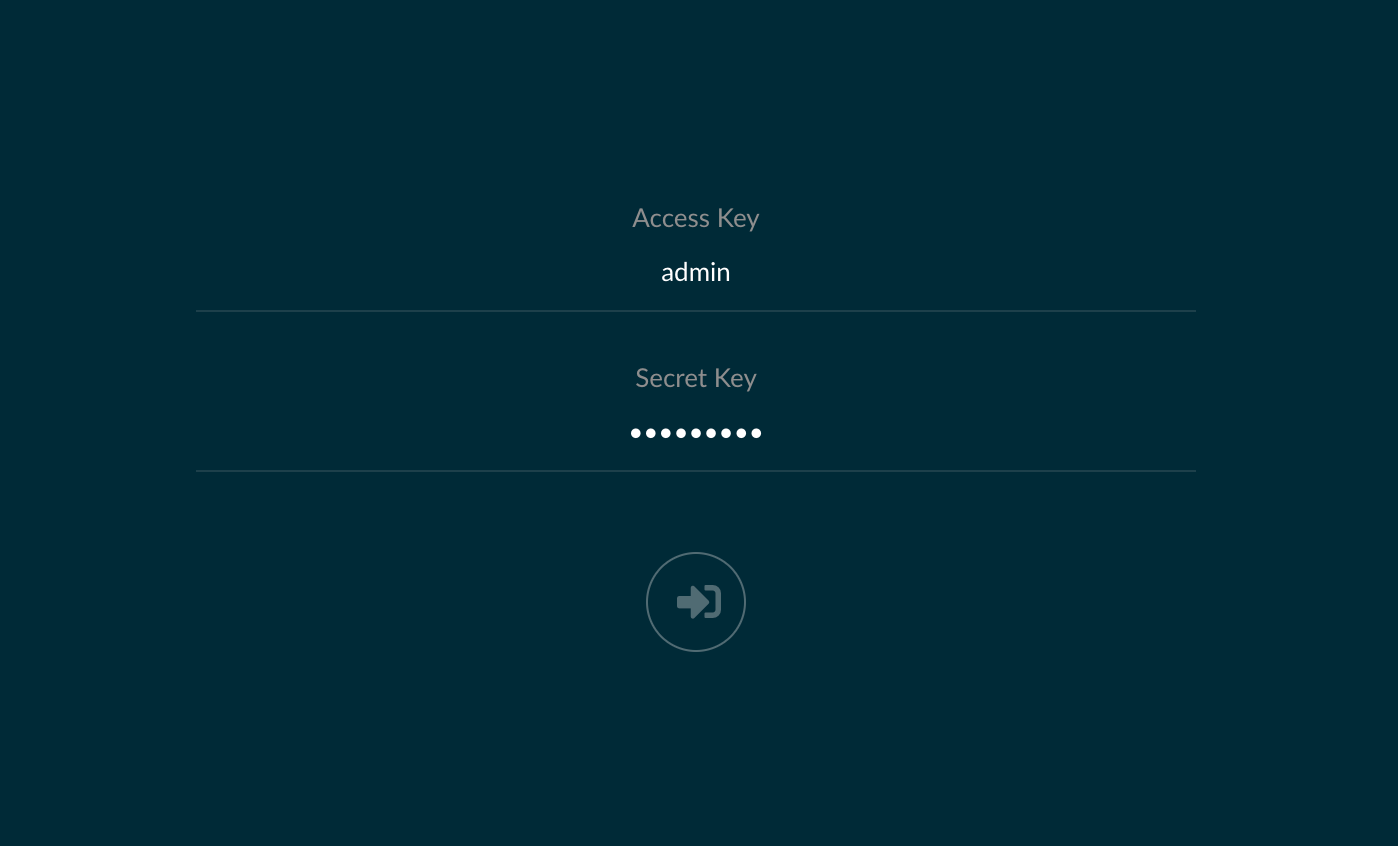
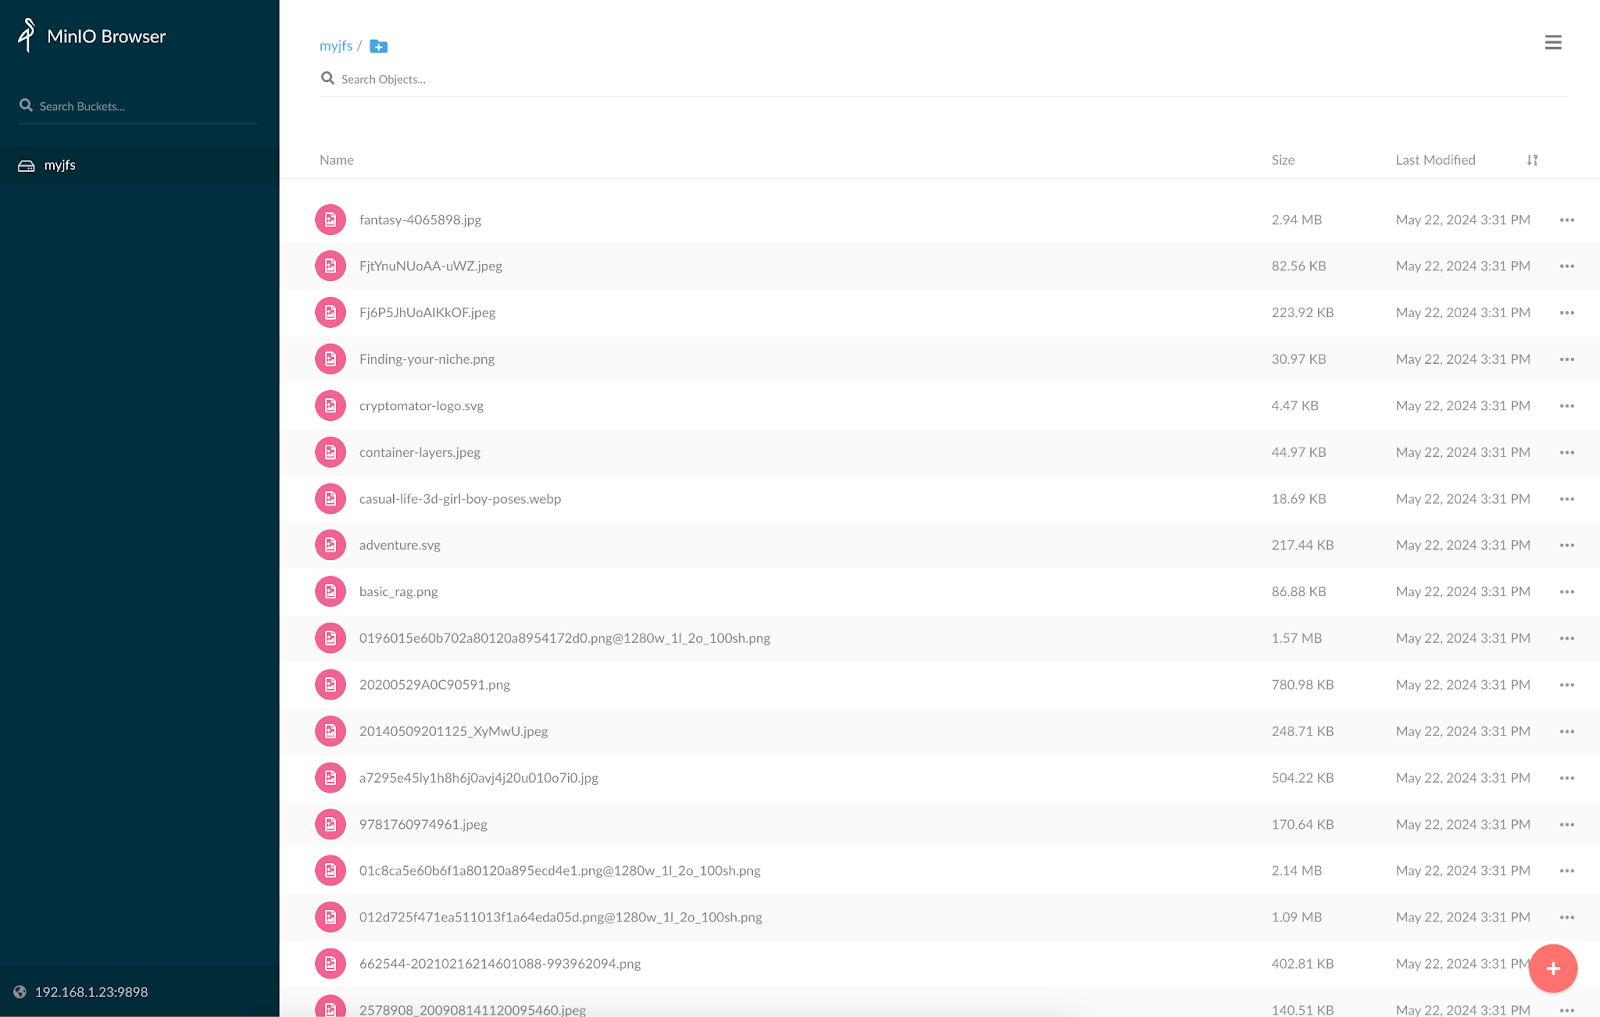
After you log in, you can see:
Install MinIO Client
MinIO Client (mc) is a client provided by Minio to manage its object storage services. In addition to MinIO Server, it can also manage any S3 API-compatible object storage and local file systems.
JuiceFS S3 Gateway, implemented using Apache 2.0 licensed MinIO S3 Gateway, requires mc for managing advanced features.
To ensure compatibility, download the mc version RELEASE.2021-04-22T17-40-00Z. You can find the version suitable for your system and architecture here. The following is an example for x86_64 architecture Linux systems:
# Download the mc version RELEASE.2021-04-22T17-40-00Z.
curl -L https://dl.min.io/client/mc/release/linux-amd64/archive/mc.RELEASE.2021-04-22T17-40-00Z -o mc

# Install the client to the executable path.
sudo install mc /usr/local/bin
Add the JuiceFS S3 API as an mc storage service:
# Command format
mc alias set <ALIAS> <URL> <ACCESS-KEY> <SECRET-KEY>

# Example
mc alias set juicefs http://192.168.1.23:9898 admin abc123abc

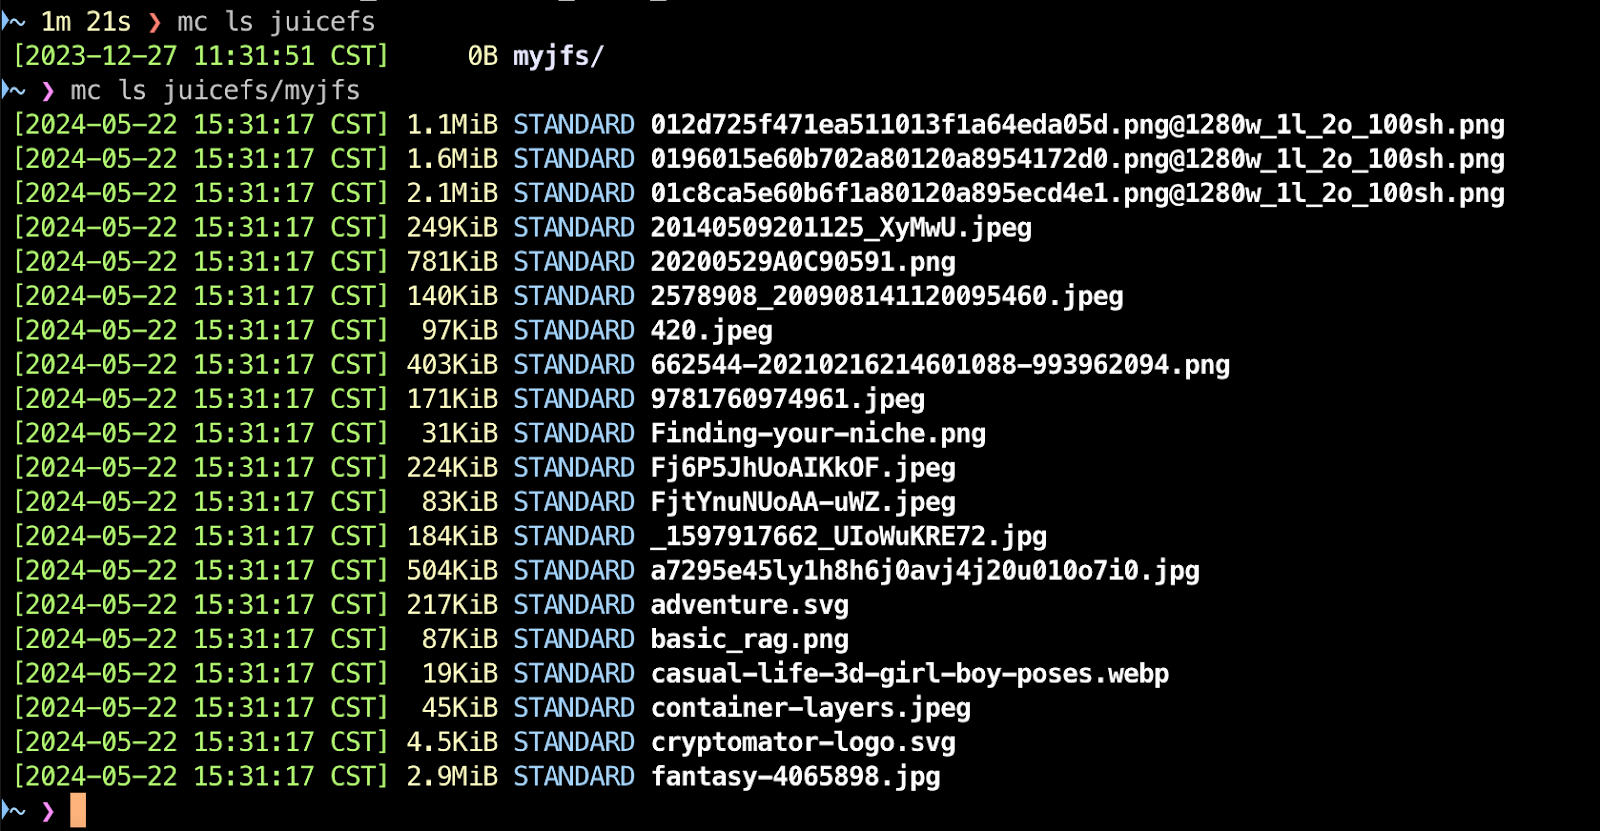
Now, you can manage the files stored in JuiceFS using mc. Based on the above settings, use the alias "juicefs" to access the file system, such as listing the files the file system:
IAM
Previously, an S3 Gateway process could only set one user (S3 API's access key ID and access key secret). To set multiple users, you had to start new processes. JuiceFS 1.2 introduces IAM. When starting the gateway, you still need to set an initial user through environment variables like the old version, but you can then use mc admin to create more users and assign different permissions as needed. You can create and manage three types of accounts:
- Regular users
- Service accounts
- Security token service (STS)
Manage regular users
To create a new user with mc admin user:
# Command format
mc admin user add <ALIAS> <USERNAME> <PASSWORD>
# Command example
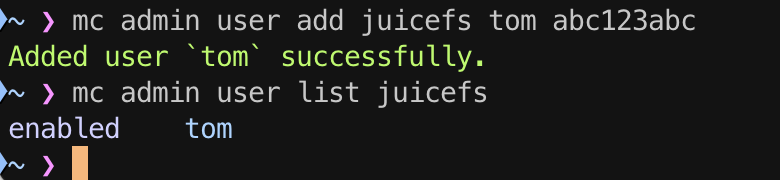
mc admin user add juicefs tom abc123abc
# List users
mc admin user list juicefs
You can log in to the WebUI as the new user tom. Initially, this user has no read or write permissions. As shown below, the files in the file system cannot be seen and there is no permission to upload files:

mc provides four pre-set permission policies, viewable with mc admin policy ls:
consoleAdmin: Full access to all resources.readonly: Read-only access to all objects.readwrite: Read and write access to all buckets and objects.writeonly: Write-only access to all locations.

Assign a policy to a user with mc admin policy set:
# Command syntax
mc admin policy set TARGET POLICYNAME [ user=username1 ]

# Assign readwrite permission to tom.
mc admin policy set juicefs readwrite user=tom

Refresh the WebUI as tom to see and upload files in the myjfs file system.
You can revoke a policy with mc admin policy unset:

Manage service accounts
For JuiceFS S3 Gateway, service accounts create a copy of an existing user with the same permissions. They allow different applications to use independent access keys.
For example, user tom has the readwrite permission. To give an application access without sharing tom's access key, we can create a service account:
# Command format
mc admin user svcacct add ALIAS ACCOUNT

# Command example
mc admin user svcacct add juicefs tom --access-key tom-sc1 --secret-key abc123abc

Service accounts inherit permissions from their primary accounts and maintain the same permissions. They cannot have policies directly attached to them.
In the example above, the primary account for the service account tom-sc1 is tom. Since tom has the readwrite permission, tom-sc1 can also read and write to the file system. To restrict tom-sc1's permissions, you must adjust tom's permission policy. For example, if you want tom-sc1 to have readonly access, you need to set tom's policy to readonly.
Manage STS tokens
Security Token Service (STS) is used to obtain temporary security credentials. These temporary credentials allow users or applications to access buckets and objects with short-term access permissions. STS is typically used in scenarios where temporary, secure access to resources is needed, replacing long-term credentials to enhance security.
You can refer to the API parameters in the document to programmatically request STS tokens. Alternatively, you can use AWS CLI to simplify this process. Here’s how to request an STS token using AWS CLI.
Note:
The superuser created at the gateway startup cannot be used to request STS tokens. Therefore, you need to create a user with consoleAdmin permission using mc. Follow these steps:
- Download and install the AWS CLI from the GitHub repository.
- Create a user with
consoleAdminpermissions:
# Create a new user named tom.
mc admin user add juicefs tom abc123abc

# Grant consoleAdmin permission to tom.
mc admin policy set juicefs consoleAdmin user=tom

3.Configure AWS CLI with access keys.
Edit the AWS CLI configuration file, usually located at .aws/credentials, and add tom's access keys, for example:
[myjfs]
aws_access_key_id = tom
aws_secret_access_key = abc123abc
4.3. Request an STS token:
aws --profile myjfs --region none --endpoint-url http://192.168.1.23:9898 sts assume-role --role-arn '12345678901234567890' --role-session-name 'xy'
In the code above:
--role-arnmust be at least 20 characters.--role-session-namemust be at least 2 characters.
These parameters do not affect the STS token generation and can be arbitrary.
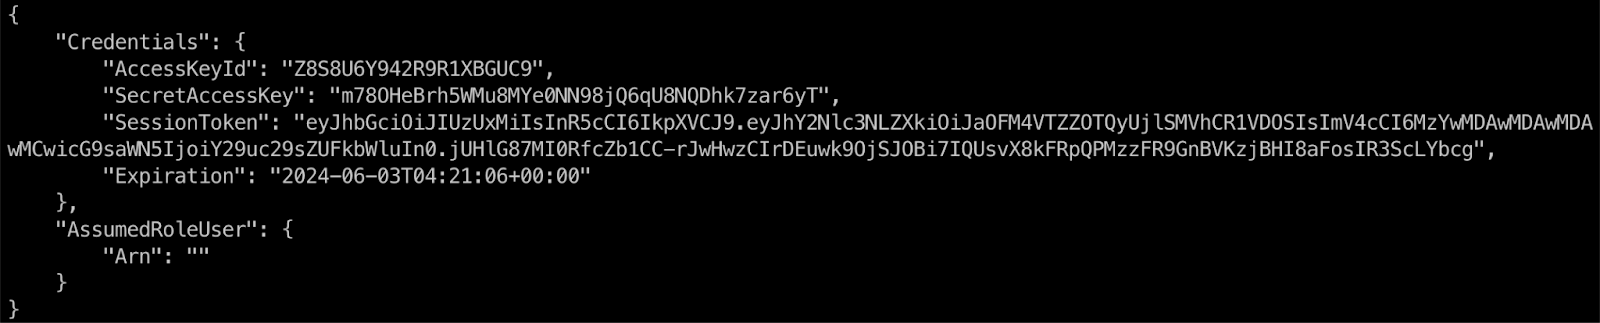
As the figure below shows, executing this command will return a JSON object with the temporary credentials. The default validity of the STS token is 3,600 seconds, which can be modified using the --duration-seconds option.
Anonymous access
S3 Gateway also supports anonymous access, allowing specified resources to be accessed without keys. This includes two ways:
- Creating temporary URLs with mc share.
- Configuring persistent anonymous access policies with mc policy.
Create a temporary anonymous access URL
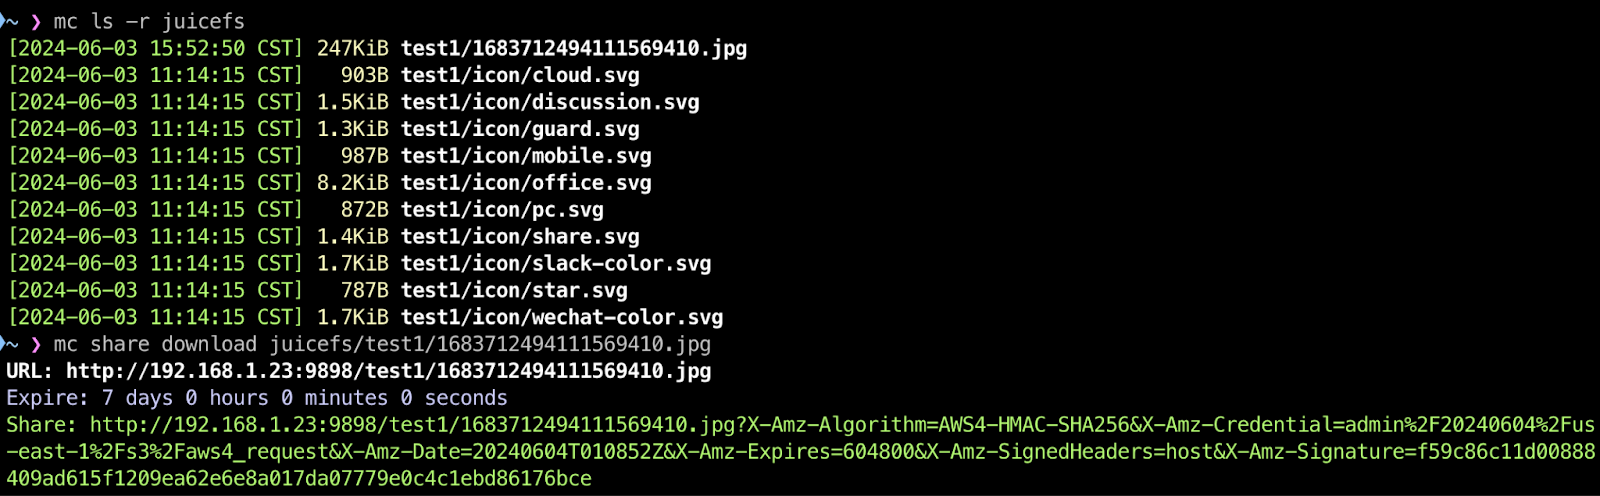
Run mc share to generate a temporary anonymous access URL for a file in the bucket:
mc share download juicefs/test1/1683712494111569410.jpg
This command generates a shareable link valid for 7 days, allowing the file to be accessed without access keys.
Configure persistent anonymous access policies
There are four policies for persistent anonymous access:
- none: No anonymous access
- download: Read-only access
- upload: Write-only access
- public: Read and write access
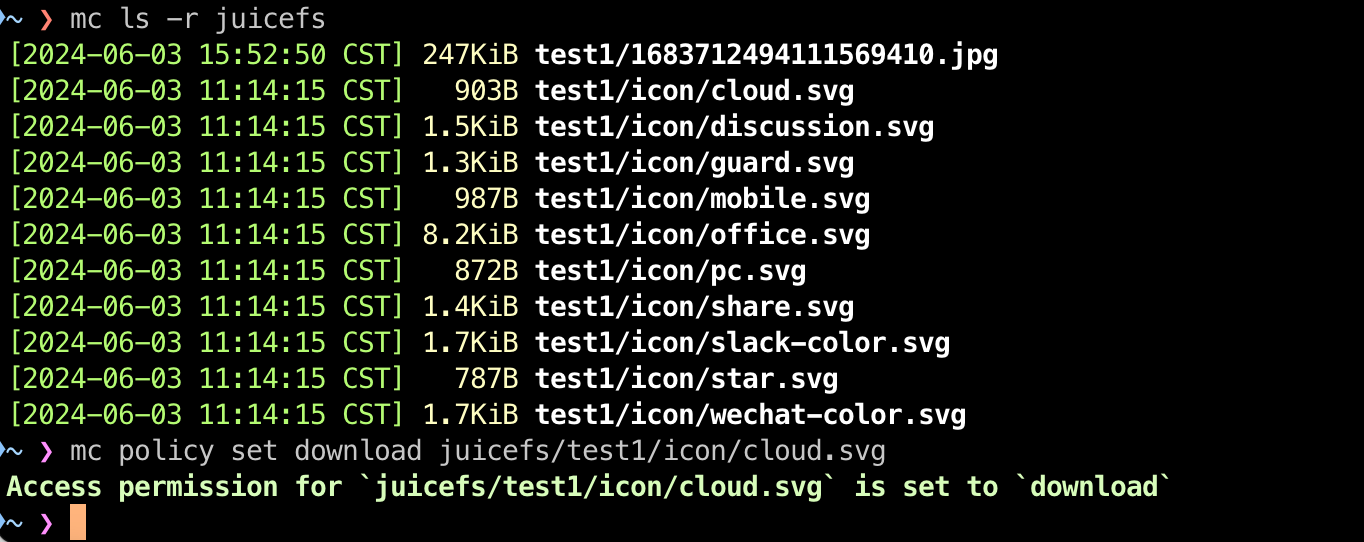
# Grant read-only anonymous access to a file.
mc policy set download juicefs/test1/icon/cloud.svg

# Grant read-only anonymous access to a directory.
mc policy set download juicefs/test1/icon/

# Disable anonymous access.
mc policy set none juicefs/test1/icon/
Once a persistent anonymous access policy is set, you can access the file using "gateway address + file path." For example, after setting the policy, you can open the file directly via http://192.168.1.23:9898/test1/icon/office.svg without needing access keys.
Multiple S3 Gateway instances
JuiceFS is distributed, so it supports running multiple S3 Gateway instances on a single file system. However, there are some considerations: - Ensure all instances use the same user at startup, with the same UID and GID. - IAM settings are synchronized between instances every 5 minutes.
Bucket event notifications
The bucket event notification feature allows you to trigger notifications when specific events occur within an object storage bucket. These notifications can be sent to external services, such as message queues or other compatible systems.
For example, you can set up a listener for object deletion events. When an object is deleted from the bucket, S3 Gateway writes the event to the configured publishing system. Other tools can then be used to retrieve records from the publishing system in real time for monitoring and alerting purposes.
Events that can be monitored are divided into bucket-level and object-level events.
Bucket events
Currently supported bucket events include:
s3:BucketCreateds3:BucketRemoved
Object events
Currently supported object events include:
s3:ObjectCreated:Puts3:ObjectCreated:CompleteMultipartUploads3:ObjectAccessed:Heads3:ObjectCreated:Posts3:ObjectRemoved:Deletes3:ObjectCreated:Copys3:ObjectAccessed:Get
Notification targets
Notification targets are external systems that receive event notifications. Currently supported targets include:
- Redis
- MySQL
- PostgreSQL
- WebHooks
You can list the supported notification targets using the mc command, for example:
# Command format
mc admin config get ALIAS | grep notify

# Example
mc admin config get juicefs | grep notify

Example configuration for Redis notifications
Here is a brief guide on setting up bucket event notifications using Redis as the target.
1.Configure the notification target.
List the configurable options for notify_redis using the command below:
mc admin config get ALIAS notify_redis

In the code above:
notify_redisis the name of the notification target. You can set multiple Redis services using thenotify_redis[:name]format, for example,notify_redis:1.formatis the notification format. The default value isnamespace, but you can also set it toaccess.keyis the name of the hash table that records notification events, and the key is automatically created.passwordis the password for the Redis service.queue_diris the directory for temporarily storing queue messages, for example,/home/events.queue_limitis the maximum length of the queue. The default value is “100000”.
JuiceFS supports two formats for Redis notifications: namespace and access.
- Namespace format: Each event notification record's key corresponds to an object in the bucket, for example,
bucketName/objectName, and the value is a JSON-encoded event data. This format synchronizes object information. When objects are updated or deleted, the corresponding record is updated or deleted. This event recording format is typically suited for scenarios that require real-time synchronization of object storage status or real-time monitoring and management of objects, such as data backup and synchronization. - Access format: Events are appended to a list using
RPUSH, with each item containing a timestamp string and a JSON object of event data. It appends records but does not update or delete records. It continuously appends records of object status like a log, without modifying the historical records due to object updates or deletions. This event recording format is suitable for scenarios where recording and analyzing the history of object access or tracking object access events are necessary, such as in security audits and access statistics.
Here, we use the default namespace format to set a notification target:
mc admin config set juicefs notify_redis:2 address="192.168.1.80:6379" password="abc123abc" key="bucketevents"
Note:
The 2 in notify_redis:2 is the name of this notification target and can be changed. Notifications are written to the Redis instance's database 0 by default.
After adding a notification target, restart S3 Gateway. Currently, the gateway does not support automatic restart, so you need to do this manually.
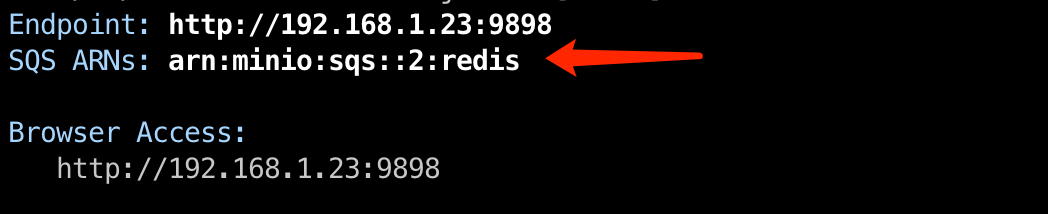
 After restarting, the terminal will display SQS ARNs information. This is needed for setting up event notifications.
Run the list command again to see the newly added notification target, notify_redis:2. Next, you can associate the events you want to monitor with this notification target.

2.Configure event listeners. To configure event notifications for a bucket, use the SQS ARN address of the notification target:
# Command format
mc event add TARGET ARN [FLAGS]

# Example
mc event add juicefs/myjfs arn:minio:sqs::2:redis

# List event listeners.
mc event list juicefs/myjfs

To enable event notifications for a bucket, you only need to specify the notification target. By default, this feature listens to all supported object events.
To verify the event notifications, you can open a new terminal, connect to the Redis instance using redis-cli, and use the monitor functionality to observe the event notifications being written. For example:
# Connect to Redis service.
redis-cli -h 192.168.1.80

# Authenticate
192.168.1.80:6379> AUTH <password>

# Enable real-time monitoring.
192.168.1.80:6379> monitor
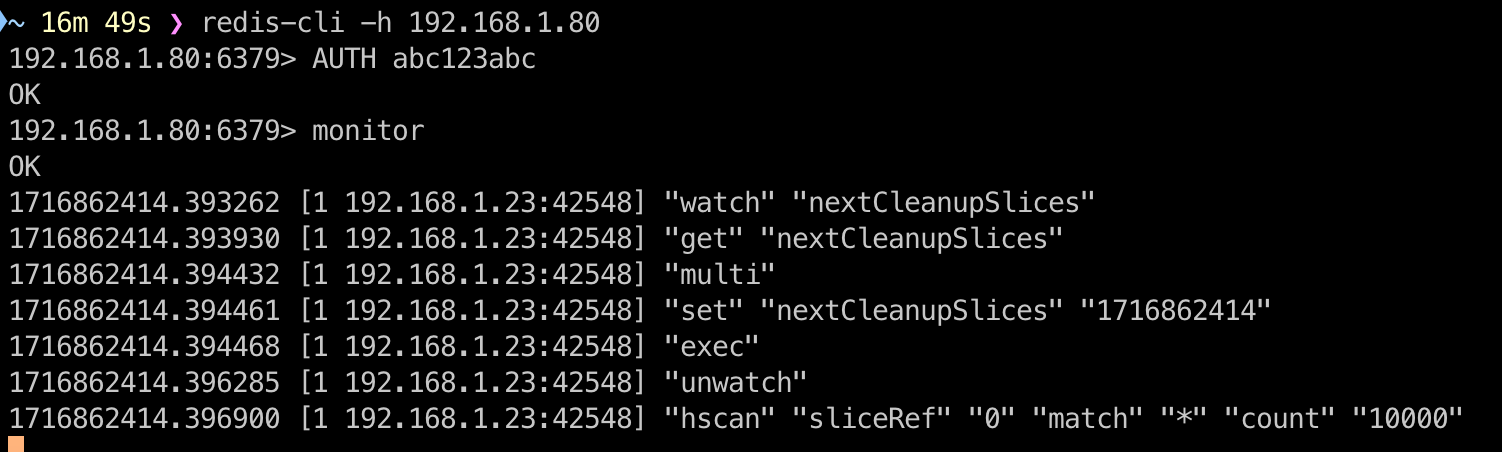
Copy a file to the bucket:
mc cp 1683712494111569410.jpg juicefs/myjfs

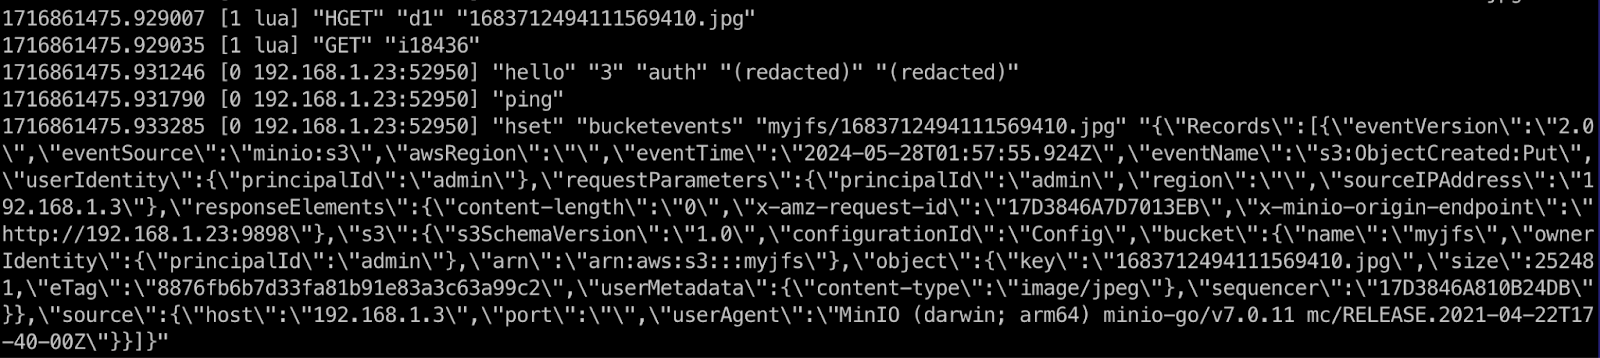
Once the file is copied, you will see a new record in the bucketevents hash table in redis-cli. The key is “myjfs/1683712494111569410.jpg”, the file name with its path, and the value is the JSON details of the event.
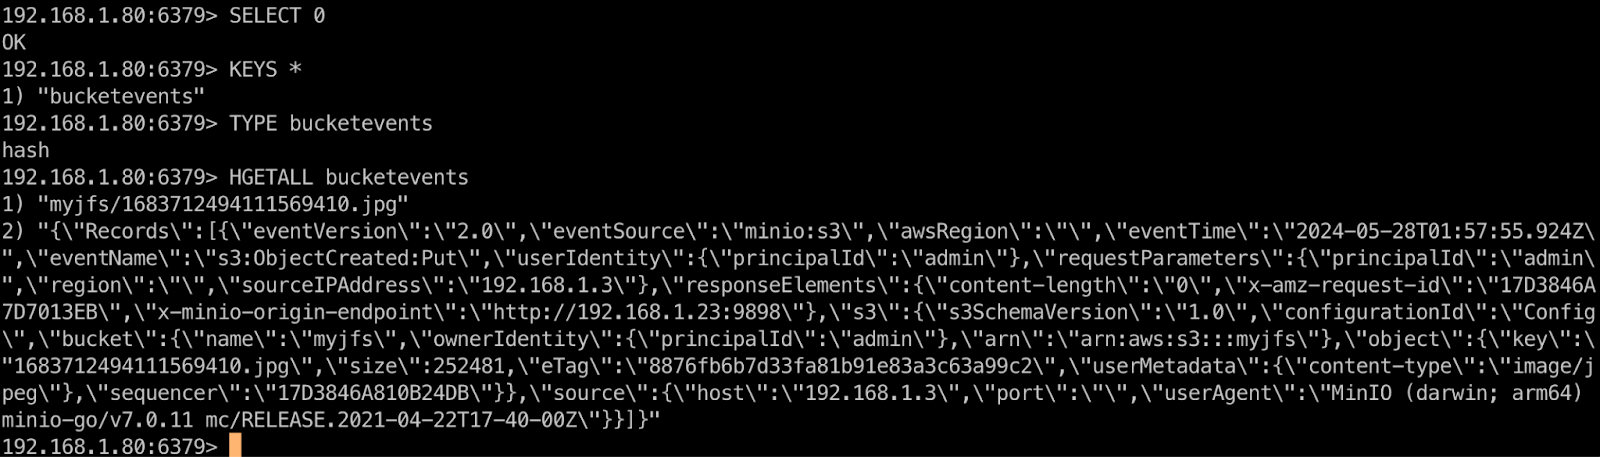
As mentioned earlier, event notifications are recorded in Redis' database 0 by default. You can view using redis-cli:
Reset IAM and event notification settings
IAM and event notification settings are stored in the .minio.sys directory at the root of the JuiceFS file system. To reset these settings:
- Stop JuiceFS S3 Gateway.
- Mount the file system.
- Delete the
.minio.sysdirectory in the root of the file system, for example,rm -rf .minio.sys.
Summary
This article introduced two new features of JuiceFS 1.2 for S3 Gateway: IAM and bucket event notifications. It provided examples for basic configuration and usage.
For more details and advanced usage, see the JuiceFS document. If you have any questions or suggestions, you can join JuiceFS discussions on GitHub and our community on Slack.